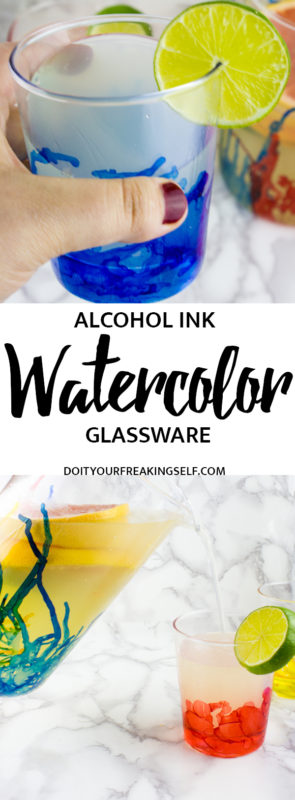
Create to impress this summer with this DIY Alcohol Ink Pitcher and Glass set! A perfect fit for a backyard party or watercolor paint and sip!

This post may contain affiliate links. Shopping from these links means that the price stays the same for you but I get a few pennies to keep the coffee pot full and possibly the cat fed.
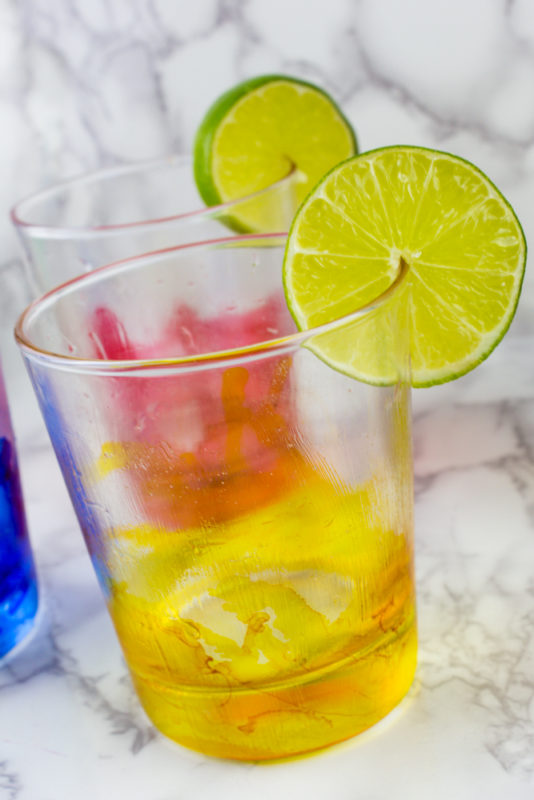
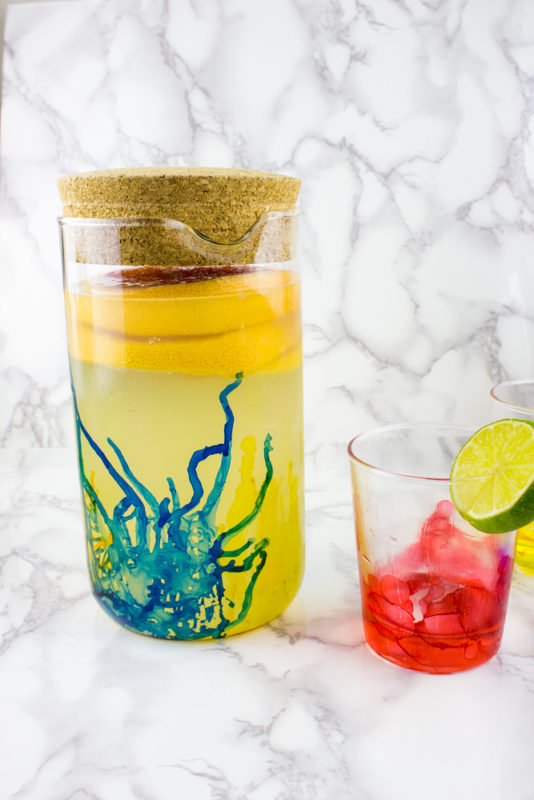
It’s officially summer! That means pool parties, back yard star gazing, picnics and brunch. All in wide brimmed hats and flowy skirts. It also means summer drinks and the fun barware gets to come out to play! Okay so it is probably known that I have a thing for watercolor and alcohol ink. I just love how they look all colorful and smokey! For this alcohol ink pitcher and glass set, I kept it colorful using three primary colors and an easy coat of dishwasher safe mod podge. Yep! That’s it! Whatever colors you wanna make them, go for it! Just embrace that quirky side of you and do splotches or drips or whatever you like, then serve up your favorite drink to yourself and some of your favorite people!
Cost: $20-30 depending on what you have on hand
Time: Weekend Project
Fun level: During the project is like a 4 but after when you’re drinking margaritas it’s definitely a 10!
DIY Alcohol Ink Pitcher and Glass Set
Supplies:
Glass Pitcher – I got this one from IKEA
Glass cups – I also got these from Ikea
Alcohol Ink
Rubbing Alcohol
Cotton pads
Paint brush
Straw (optional)
Dishwasher Safe Modpodge
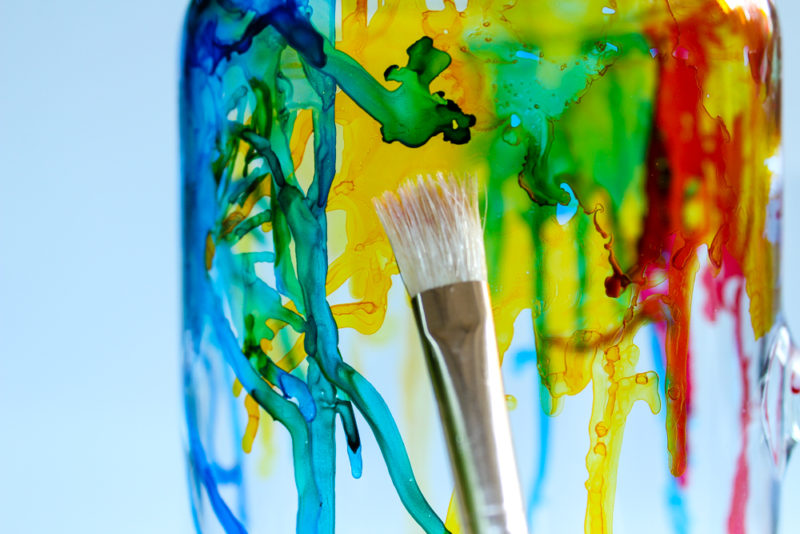
Start by cleaning off your pitcher and glasses with the rubbing alcohol and a cotton pad. This will help to ensure that you have a clean surface and that the ink will spread correctly. Work with the pitcher or glass upside down.

Working on a covered surface, paint a section of the bottom edge of the glass with rubbing alcohol. Then use a paint brush or the tip of the ink to paint alcohol ink on that section of your pitcher or glass. Use the straw or just tip the glass to guide the ink as it dries. It dries really quickly, but using a straw and/or blowing on it can help it along and make sure the ink doesn’t run further than you want it to.
This can take some trial and error, but the great thing is that if you mess up, you can always take it off with rubbing alcohol and start again!
Once you’re happy with your glasses and pitcher let them dry for about 2 hours. You can probably use less time but that’s what I did just to be safe.
Once your ink has set, gently paint a thin layer of dishwasher safe modpodge over the ink and up to 1/4 inches away from the lip of the glass. Let it dry overnight then add a second layer. You’re supposed to let this cure for 28 days for it to form a hard shell, but if you’re impatient like me, you can cure it in an oven.
How to cure dishwasher safe modpodge in an oven:
In a cold oven, place your items on a baking sheet. Heat the oven to 175°F then bake for 1 hour. Turn the oven off and allow your pieces to cool with the oven. I usually do this before I go to bed so they can cool over night. Once your pieces are done, they are top shelf dishwasher safe!


Go forth and make yummy margaritas and entertain your friends all day long! Don’t forget to PIN for later!
SaveSave
SaveSave


