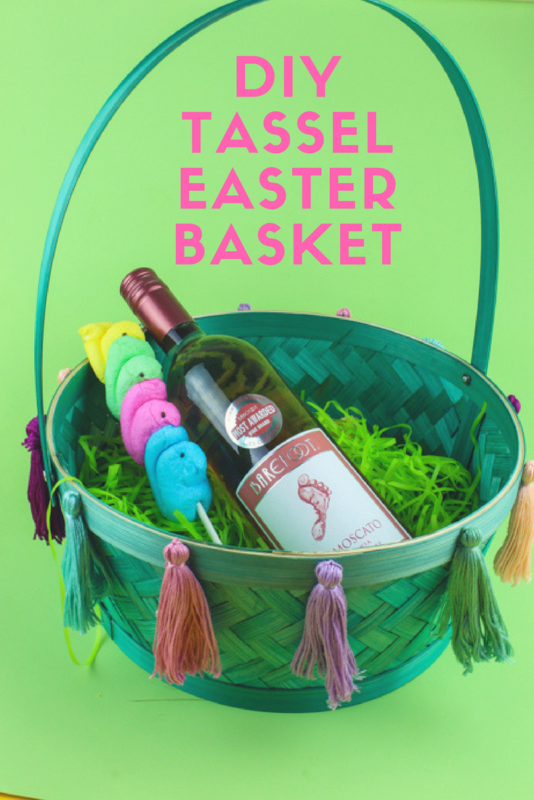
Spruce up a simple basket for your own DIY Tassel Basket for Easter! Perfect for a grown up look with all the fun you remember when you were a kid!
This post may contain affiliate links, that means I make a few pennies if you purchase through my links….but the price for you stays the same!
When I was a kid Easter was this magical experience. Like Christmas but with pastels. It’s the start of spring and the end of lent and one year we got honest to God bunnies. Like real ones! I remember waking up every year to a trail of hershey kisses or jelly beans or whatever my parents decided to lay out that year and go on this epic hunt with my sister to find our Easter baskets. They never disappointed either! Then we all dressed in super frilly dresses (because that is what one does when they’re seven years old on Easter) and headed off to Church. As an adult without my own kids, I still try to keep that magic around whether it’s with the kids I babysit for or with my friends. In recent years we’ve done Easter basket exchanges, a bit like secret santa, but you know…. with bunnies and chocolate crosses and wine. Yep. This year, I’m showing you how to make your own unique Tassel Basket for Easter goodies to impress your friends and make yourself feel classy AF.
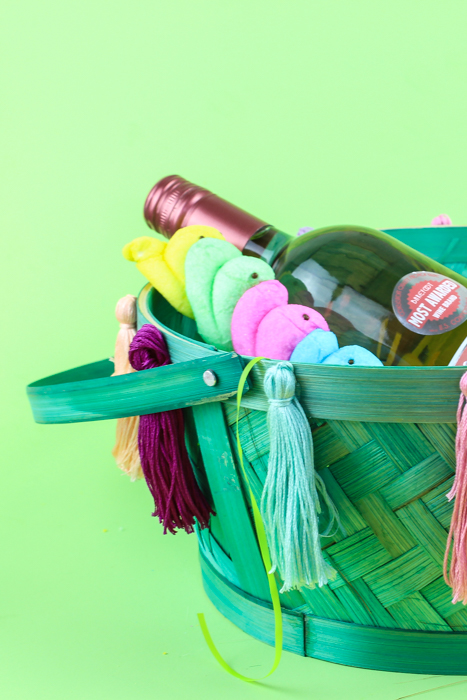
DIY Tassel Basket for Easter
Supplies:
Bamboo Basket – I got mine from Target for about $2.50
Embroidery floss (12 skeins total. Mix and match colors!)
Scissors
Bulldog clip
Hot Glue
Barefoot wine (for drinking after)
Time: 30 minutes or less
Cost: $6
Classy Level: Um… it’s pretty high up there.


