Looking for a fun spring craft project? This DIY confetti mug is easy and adds a pop of color to your otherwise drab morning!
This post may contain affiliate links, that means I make a few pennies if you purchase through my links….but the price for you stays the same!

I don’t know about you guys but I need at least 2 cups of coffee in the morning to actually move my butt. Like big cups. Like biggest setting on the Keurig big. Before that I look and feel like something that just stepped out of the Walking Dead… and not one of the good guys. As a result I am always looking for a fun large coffee mug to bring at least a little morning happiness to my otherwise horror show of a morning. Especially those early wakeup calls! 5 am is not my friend!!! Okay, so this project is basically an attempt to make my mornings less of a scary TV show and more of a… well… a “good” morning. See how to use tissue paper to transform plain large coffee mugs with a confetti design – a simple DIY!
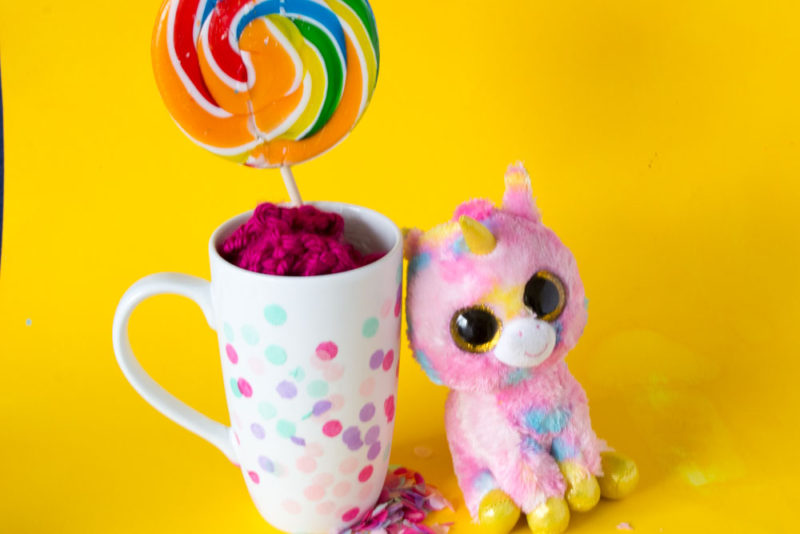
Confetti Mug
Supplies Needed:
Large coffee mugs
Tissue paper confetti – I found mine at Target
Dishwasher Safe Mod Podge
Foam brush
Time: 30 minutes + Dry time
Cost: $10 or less – Depending on what you have on hand
Morning Happiness: at least 3 smiles
Want to make more mugs! Check out these watercolor mugs or this Dark Side Star Wars mug
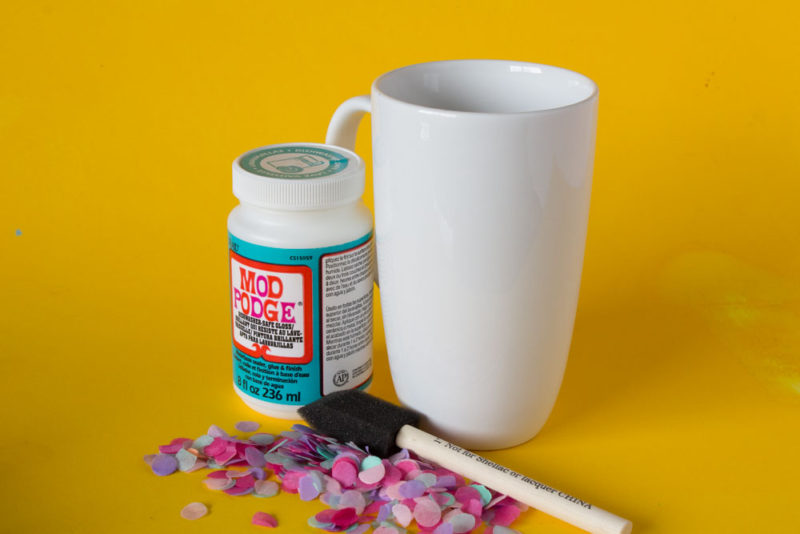
To create your confetti mug, start by cleaning your large coffee mug with rubbing alcohol. Once it’s dry, add a thin layer of dishwasher safe mod podge to a small area of the mug.
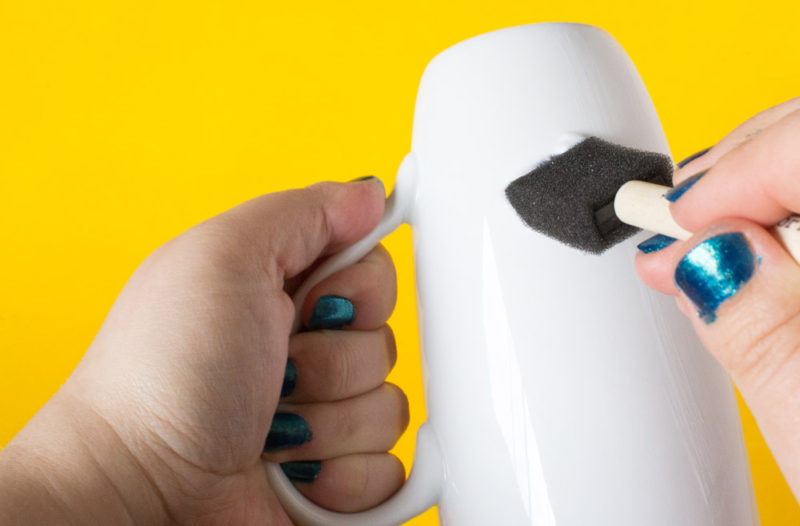
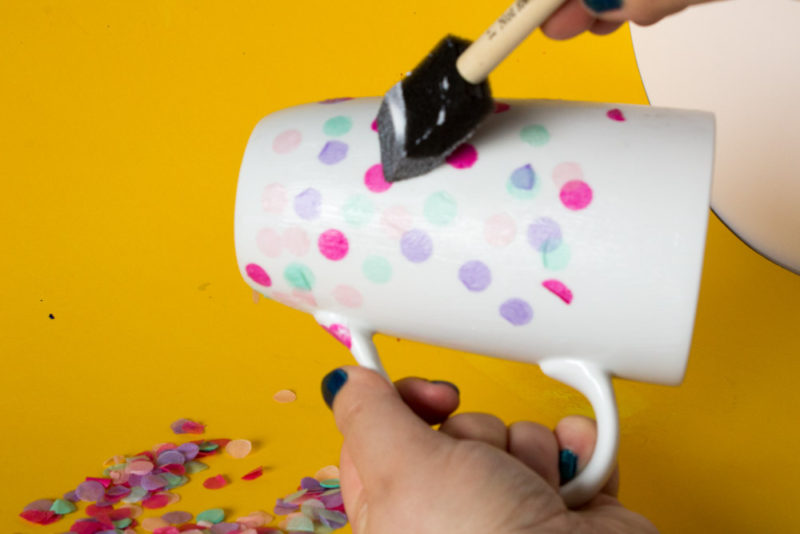
Next, layer the confetti on to the mod podge. You can overlap to create really cool effects. Sometimes the confetti can stick together so be sure to separate as much as possible or else you’re going to get a really thick stack and it won’t cover correctly.
Continue adding modpodge and confetti to the large coffee mug in small sections until you’re happy with the look of the mug. Allow to dry.

Once the confetti and mod podge are dry you’re going to add a thin layer of mod podge to the entire cup. You may need to dab it in a few sections to keep the confetti from coming up if it’s not completely secure. Apply at least 2 layers (3 is best), allowing the cup to dry in between.
Let it cure for 48 hours and you’re ready face the day with your very own DIY Confetti mug!

Super cute, right? If you love confetti as much as I do, then don’t forget to pin this to your spring crafts board!






28 Comments
Super cute! It would make my early morning coffees a little more cheerful!! Visiting from Snickerdoodle Sundays party.
February 18, 2017 at 7:49 pmConfetti in the morning is always a good look!
February 19, 2017 at 6:58 amYES!!!
February 21, 2017 at 8:03 pmSo bright and colourful and a great gift idea. Thanks for sharing with us at #OvertheMoon link party. I’ve pinned and shared.
February 20, 2017 at 3:37 pmI love, love, love this! I haven’t even made one yet and I’ve already smiled 3+ times! Thanks so much for the awesome idea. I am definitely going to be picking up some of that Mod Podge (I had no idea that was a thing).
February 21, 2017 at 6:05 amAw yay! So glad its bringing smiles to your day!!!
February 21, 2017 at 8:01 pmI totally just saw that you shared this with at Merry Monday, too, so I had to stop back by to say thanks! I seriously love this soo much!
February 24, 2017 at 7:34 amThis is adorable! I love cute coffee mugs & this one I can make myself!
February 21, 2017 at 7:14 pmThanks Lindsey! They’re so fun to make and will make your mornings so happy!
February 21, 2017 at 7:52 pmIt turned out so cute — love the color of confetti!
February 21, 2017 at 7:16 pmThanks Heather!!!!
February 21, 2017 at 7:51 pmThat’s so cute, love it! Thanks for sharing this at the DI & DI Link Party, we loved having you.
Have a great day!
February 24, 2017 at 5:36 amI love it. I get your idea!
February 25, 2017 at 2:35 amMacy
This is super cute! Thanks for sharing, I found you on the Totally Terrific Tuesday link party!
February 25, 2017 at 6:34 pmThanks so much for stopping by!!
March 1, 2017 at 8:39 pmVery cute! This would make a great gift!
February 25, 2017 at 6:41 pm#SITSBlogging
[…] Patio Decor Ideas | Confetti Mug | DIY Color Block […]
February 26, 2017 at 4:01 pmLove this, it’s so cute. This post is being featured at the new Merry Monday party! Thanks for sharing with us.
February 26, 2017 at 4:49 pm[…] DIY Confetti Mug @Do It Your Freaking Self […]
February 26, 2017 at 6:00 pm[…] Patio Decor Ideas | Confetti Mug | DIY Color Block […]
February 26, 2017 at 7:28 pm[…] DIY Confetti Mug – Do It Your Freaking Self […]
February 26, 2017 at 8:00 pmThis is such a FUN project idea, so bright and happy! You’re included in this week’s Monday Funday features, thank you for sharing! <3
February 27, 2017 at 7:00 amSo cute!! I never thought to use tissue paper on a mug. Great way to up your creativity.
Thanks for sharing at #bloggerspotlight
February 27, 2017 at 6:16 pmI wanted you to know that I featured this project on the Create Link INspire party that you linked up to. It’s such a great DIY. It’s so fun! Thanks for including it.
February 28, 2017 at 1:21 pmThanks so much!
March 1, 2017 at 8:38 pmI like this mug. Looks like it could be done for special color themes, i.e. in greens for St. Patty’s Day or reds and pinks for Valentine’s Day.
March 4, 2017 at 8:30 am[…] Patio Decor Ideas | Confetti Mug | DIY Color Block […]
March 4, 2017 at 11:46 am[…] Doily Burlap Pillow Cover Dripped Paint Desk Storage DIY Confetti Mug DIY Organization Idea DIY Recipe Box DIY Painted Planter Pots DIY Succulent Dish Garden DIY Wine […]
September 4, 2017 at 11:26 am