Browsing Tag:

dollar store crafts

DIY Conversation Hearts Sleep Mask

on January 23, 2018

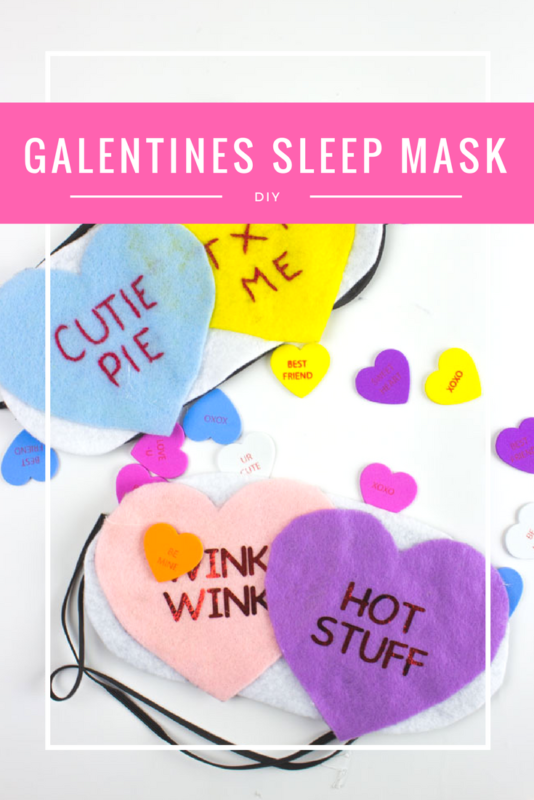
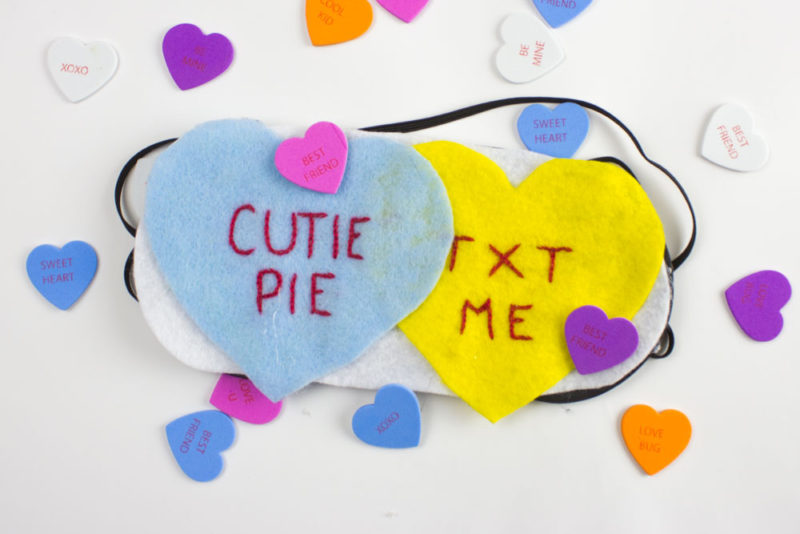
Whether you’re celebrating Valentines or Galentines this DIY Conversation Hearts Sleep mask is a perfect DIY addition to any sleep over!

In case you guys weren’t aware – because I’m really bad at life updates – I went back to school. It’s only one class right now, but that on top of a crazy work schedule means that I am adulting like crazy over here.

Whether you're celebrating Valentines or Galentines this DIY Conversation Hearts Sleep mask is a perfect DIY addition to any sleep over! | Do It Your Freaking Self | #Galentines #Conversation Hearts #Valentines #adultcrafts

Okay, so last year for my birthday I ordered a TON of sleep masks for a make and take craft. Needless to say I had a bunch left over and I’ve been trying to think of a fun thing to do with them. As it is Valentines (or Galentines) season, what better way to use them than with this DIY Conversation Hearts Sleep Mask. As I was making them, I envisioned myself having a sleep over where we all made these. Alas, as I’m adulting and working and going to class all the time, that is not happening, but a girl can dream right!

DIY Conversation Hearts Sleep Mask

Whether you're celebrating Valentines or Galentines this DIY Conversation Hearts Sleep mask is a perfect DIY addition to any sleep over! | Do It Your Freaking Self | #Galentines #Conversation Hearts #Valentines #adultcrafts

Time: 15 min to 1 hour
Cost: $5 or less
Cuteness level: A solid 8

Continue reading

Food Safe DIY Jack Skellington Cake Stand

on September 26, 2017

Scare up a good treat by making a simple DIY Jack Skellington Cake stand! Perfect for your Halloween decor or party tablescape! Dollar Store DIY!

Scare up a good treat by making a simple DIY Jack Skellington Cake stand! Perfect for your Halloween decor or party tablescape! Dollar Store DIY! - Nightmare Before Christmas | Tim Burton | Food Safe | Halloween Projects | Party table - Doityourfreakingself.com

Do you ever have those movies that you’re maybe glad you didn’t see as a kid but are also your favorites? I was not allowed to see Nightmare Before Christmas when it came out. Granted, I was about 5 years old with an overactive imagination so this was probably a good decision on my parent’s part. And while I still have quite the imagination, this film has become one of my absolute favorites… At this time of year especially.

MAKE IT: NIGHTMARE BEFORE CHRISTMAS ZERO PILLOW PAL

Also, Hocus Pocus! I saw that movie when I was 7 and it (for some reason) scared the bejebus out of me! I don’t think my parents ever would have let me see it at that age, but we were at a neighbors house and no one really told our parents what we were watching. I spent the entire walk home thinking Billy Butcherson was chasing me and that I should never light a black candle. Like… ever. Now… I love that movie! It is so delightfully campy and I can’t figure out why I was scared in the first place. However, I probably would have loved it anyway so there’s that.

Scare up a good treat by making a simple DIY Jack Skellington Cake stand! Perfect for your Halloween decor or party tablescape! Dollar Store DIY! - Nightmare Before Christmas | Tim Burton | Food Safe | Halloween Projects | Party table - Doityourfreakingself.com

Okay so yes, I had protective parents. But a part of me is glad they understood me enough to not let me give myself nightmares.

Anyway!!! Welcome the Halloween Season! I’m so glad you’re here! It’s probably my favorite because it is also fall and I can wear sweaters with Star Wars characters on them and not get funny looks. This year, I’m hosting a Tim Burton inspired Halloween party so I KNEW I needed to create something Jack themed. This Food Safe DIY Jack Skellington Cake Stand cost me $10 MAX and I can’t wait to show you how to make it!

Food Safe DIY Jack Skellington Cake Stand
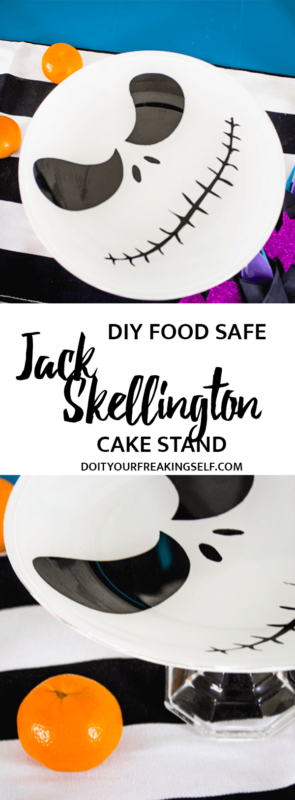
Scare up a good treat by making a simple DIY Jack Skellington Cake stand! Perfect for your Halloween decor or party tablescape! Dollar Store DIY! - Nightmare Before Christmas | Tim Burton | Food Safe | Halloween Projects | Party table - Doityourfreakingself.com

Time: 30 minutes + Heat/Dry Time
Cost: $10 or less
Spooky Level: 2

Scare up a good treat by making a simple DIY Jack Skellington Cake stand! Perfect for your Halloween decor or party tablescape! Dollar Store DIY! - Nightmare Before Christmas | Tim Burton | Food Safe | Halloween Projects | Party table - Doityourfreakingself.com

Supplies:
9″ Clear glass plate – I got mine from Ikea but you can get the same ones from amazon.
Multi Surface or enamel paint in black and white
Paintbrush and large foam pouncer
Clear spray sealant (optional)
Glass candle stick – I got mine from the dollar store
E6000 Glue
Printout of Jack’s Face – I sized mine to be 7.5 inches just to give myself some room – you can do this by either loading it into a photo editor or playing around with the scale.


Start by cleaning the back of your plate with rubbing alcohol.

Place the Jack Skellington face on your surface with the plate FACE DOWN over it. This will give you a guide to paint the face!

Scare up a good treat by making a simple DIY Jack Skellington Cake stand! Perfect for your Halloween decor or party tablescape! Dollar Store DIY! - Nightmare Before Christmas | Tim Burton | Food Safe | Halloween Projects | Party table - Doityourfreakingself.com

Using a paintbrush and black enamel paint carefully paint the design on the back side of the plate. Allow it to dry then add a second coat. Let it dry for at least 2 hours.

Scare up a good treat by making a simple DIY Jack Skellington Cake stand! Perfect for your Halloween decor or party tablescape! Dollar Store DIY! - Nightmare Before Christmas | Tim Burton | Food Safe | Halloween Projects | Party table - Doityourfreakingself.com

Scare up a good treat by making a simple DIY Jack Skellington Cake stand! Perfect for your Halloween decor or party tablescape! Dollar Store DIY! - Nightmare Before Christmas | Tim Burton | Food Safe | Halloween Projects | Party table - Doityourfreakingself.com

After painting the face, it’s time to fill in the back. I originally used spray paint but it ended up bubbling and probably wouldn’t have held up after washing. SO! Switching tactics, using white enamel or multi surface paint and a large foam pouncer, fill in the back of the plate. Make sure to paint over the black areas too so the plate will look good from all angles. Let it dry for an hour and go back in for a second coat or just fill in patchy places.

To heat set your paints PLEASE follow the instructions on your paint. Each kind is different with different dry times and I don’t want to tell you different.

I let mine dry for 1 hour then set the plate in a COLD oven paint side up. I then heated the oven to 350 then let it cook for 30 minutes once it hit temperature. After that I let it cool IN THE OVEN with the door open.

Once your paint is set, it’s time to add the stand part. I’ve seen people use other things like painted vases or wooden candle sticks so just find what you like. You do you girl! I chose the candle stick because I happened to have a few in craft storage and figured I should probably use it.

Scare up a good treat by making a simple DIY Jack Skellington Cake stand! Perfect for your Halloween decor or party tablescape! Dollar Store DIY! - Nightmare Before Christmas | Tim Burton | Food Safe | Halloween Projects | Party table - Doityourfreakingself.com

Mark the center of the plate – I measured 4.5 inches in from the edges – and use E6000 glue to secure the candle stick to the bottom of the plate. Let it dry overnight and you’re good to go!

Scare up a good treat by making a simple DIY Jack Skellington Cake stand! Perfect for your Halloween decor or party tablescape! Dollar Store DIY! - Nightmare Before Christmas | Tim Burton | Food Safe | Halloween Projects | Party table - Doityourfreakingself.com

Scare up a good treat by making a simple DIY Jack Skellington Cake stand! Perfect for your Halloween decor or party tablescape! Dollar Store DIY! - Nightmare Before Christmas | Tim Burton | Food Safe | Halloween Projects | Party table - Doityourfreakingself.com

Use your DIY Jack Skellington Cake Stand as a cake stand or a cookie display! You can also use it as a jewlery holder or really whatever you’d need it for!

Scare up a good treat by making a simple DIY Jack Skellington Cake stand! Perfect for your Halloween decor or party tablescape! Dollar Store DIY! - Nightmare Before Christmas | Tim Burton | Food Safe | Halloween Projects | Party table - Doityourfreakingself.com

SaveSaveSaveSaveSaveSaveSaveSave

SaveSave
Turn dollar store placemats into a bright and fun DIY Placemat Handbag

on July 18, 2017

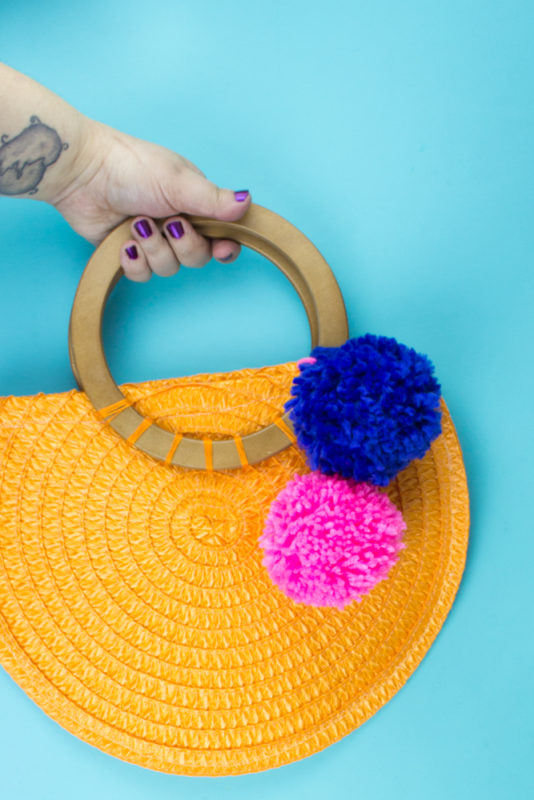
Take some cheap dollar store placemats and turn them into a bright and colorful DIY Placemat Handbag with a sew or glue method!

Take some cheap dollar store placemats and turn them into a bright and colorful DIY Placemat Handbag with a sew or glue method!


“Take me with you, I start to miss you…”
– Cross My Heart, Mariana’s Trench

If you’re a pop punker, power pop, whatever you’re into and haven’t heard of Mariana’s Trench, you’re missing out. I firmly believe they’re Canada’s appology for Justin Bieber (because all of this is after Celine Dion who is a national treasure).

This post may contain affiliate links. Shopping from these links means that the price stays the same for you but I get a few pennies to keep the coffee pot full and possibly the cat fed.

You guys! I made a thing. Okay so that’s basically how I start every day of my life. But seriously, I kinda love it. This project? It was made while on a binge of the Mariana’s Trench Pandora Station while it was 100+ degrees outside and my bedroom doesn’t have AC. I do have an evaporative cooler, but that is beside the point. To say that sweat went into this placemat handbag is an understatement… okay that’s gross. Ignore that. BUT this I gotta say is pretty cool. I even put pom poms on it and you know how I feel about pom poms. AND it’s ORANGE!!! So bright and sunny! And you can change out the pom poms for fall should you feel like it!

Make it: DIY Abstract Flamingo Bag

Time: 2 hours or less
Cost: $10 or less
Dork level: 2 – it’s pretty classy. You can dork it up with fun keychains if you want!

DIY Placemat Handbag

What you need:
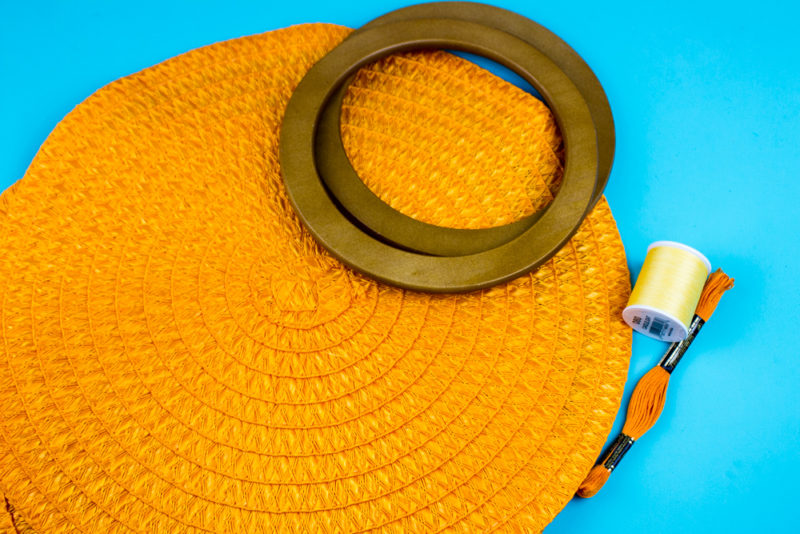
2 round placemats from the Dollar Store
Sewing machine OR Aleene’s® Original Tacky Glue® OR Hot Glue
Wooden handles
Matching color embroidery thread and embroidery needle
Wooden handles

Take some cheap dollar store placemats and turn them into a bright and colorful DIY Placemat Handbag with a sew or glue method!

Make It: Animal Butt Magnets

Take some cheap dollar store placemats and turn them into a bright and colorful DIY Placemat Handbag with a sew or glue method!


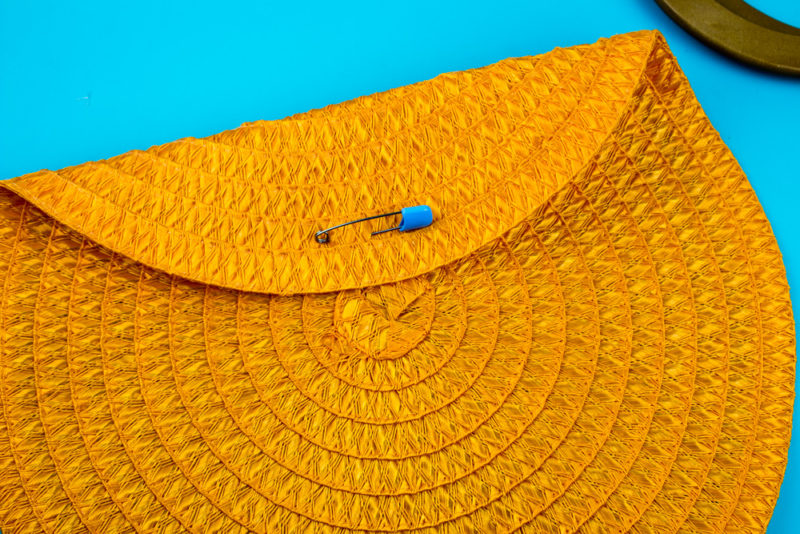
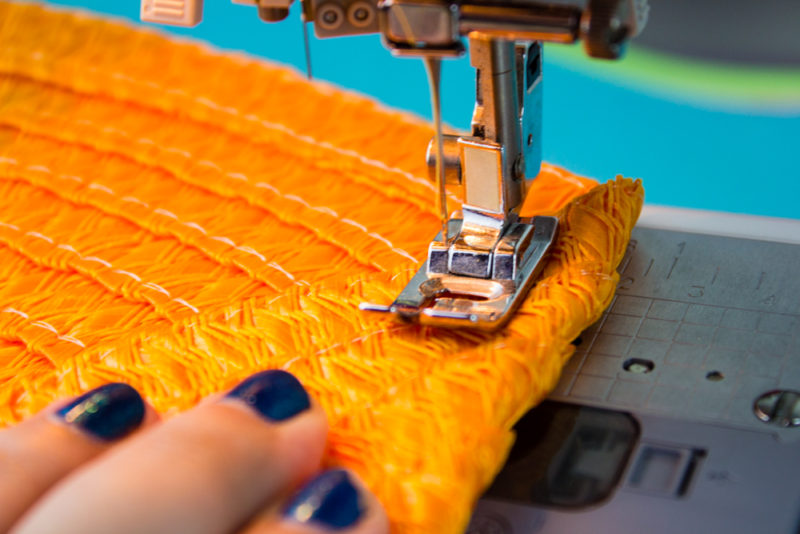
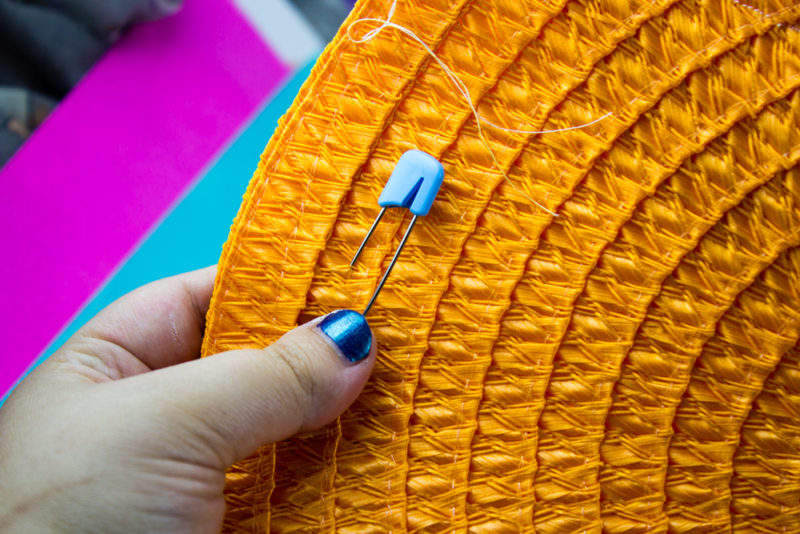
Start by folding over the top 1/3 of each placemat and secure it with a safety pin. Glue the inside with Aleene’s® Original Tacky Glue® or hot glue to secure it down or sew the top edge of the fold. – let dry if you’re using glue

Take some cheap dollar store placemats and turn them into a bright and colorful DIY Placemat Handbag with a sew or glue method!


Match the fold sides inside and pin the outside edge around with safety pins. Sew around the outside edge right up to the folded area. It’s even easier if you’re glueing!

Take some cheap dollar store placemats and turn them into a bright and colorful DIY Placemat Handbag with a sew or glue method!

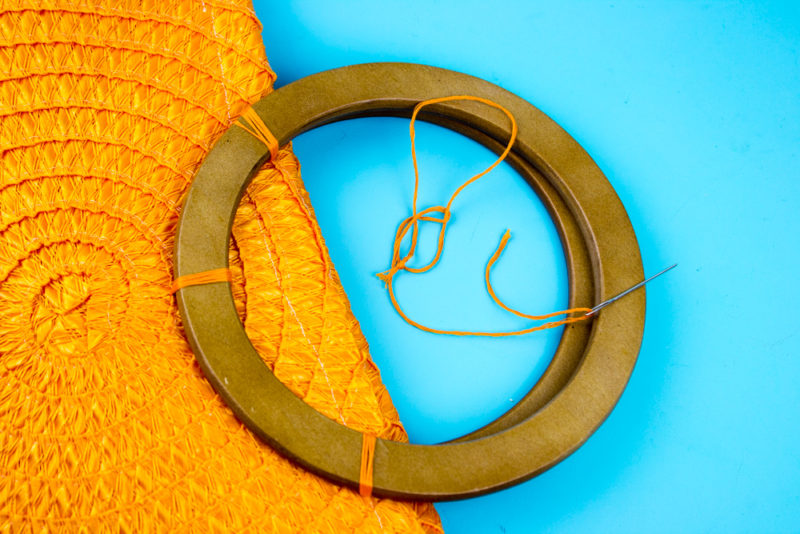
To attach the handles, position the handle centered so that 2/3 of the handle is above the fold. Secure down by loop stitching with embroidery thread and needle with 5-7 secure points. Secure each side and the center first and then add points on each side.

Take some cheap dollar store placemats and turn them into a bright and colorful DIY Placemat Handbag with a sew or glue method!

Do the same for the second. Trim up threads and glue down the stray embroidery thread to make sure knots hold.

Take some cheap dollar store placemats and turn them into a bright and colorful DIY Placemat Handbag with a sew or glue method!

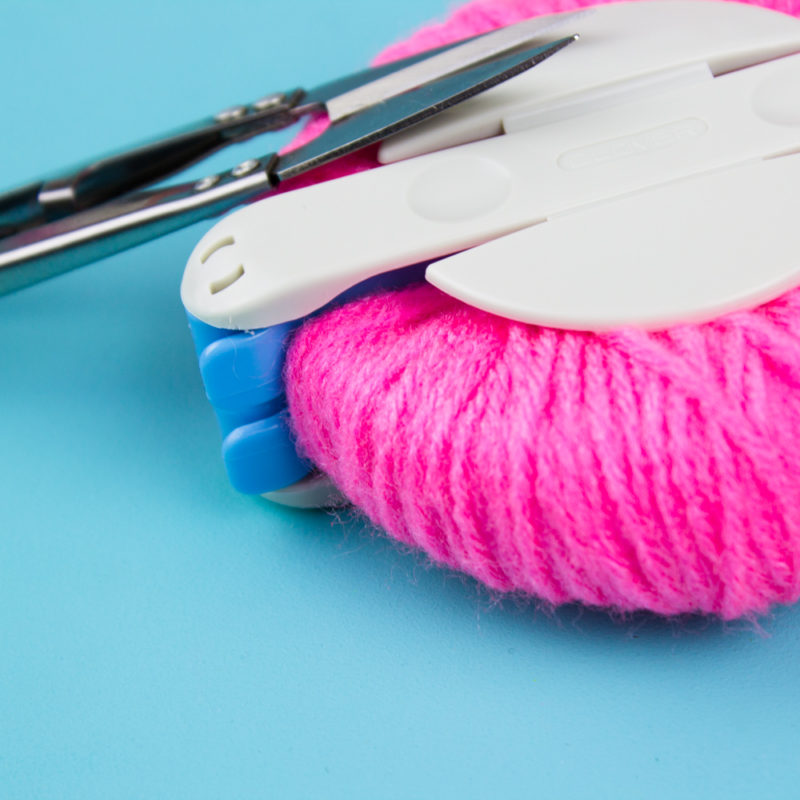
Embellish however you feel like! Pom poms, tassels, have at it!

Don’t forget to PIN to your fashion or DIY boards!

Take some cheap dollar store placemats and turn them into a bright and colorful DIY Placemat Handbag with a sew or glue method!

DIY Stamped Holiday Napkins

on October 31, 2016

The holidays are upon us you guys and I could not be more excited! I’m also not quite ready. Seriously you guys, I’m hosting my annual Friendsgiving and I haven’t even sent invites. Welcome to my life you guys. Some stuff is super organized the rest is well…. it is what it is.

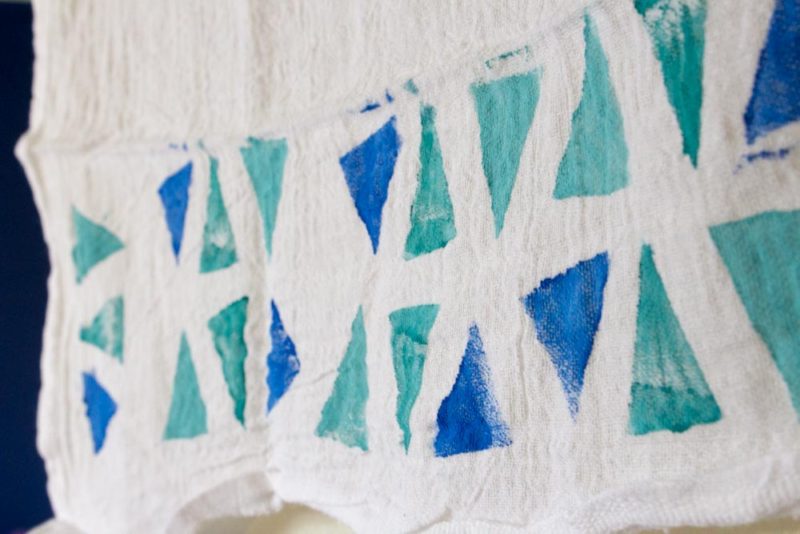
Anyway! One of the things I’m not stressing over is the table setting because DIY-ing that stuff is totally my jam. This week, I’ve been cranking out some really fun stamped holiday napkins and grabbing the kiddos to help. The best part is that I am using things that I already had in the house so I really only had to purchase the napkins. Can you say WIN! I’m sharing 2 ways to stamp your holiday napkins so hit the jump to see what we used!

Hand stamp your own DIY Holiday Napkins with things you already have at home. A simple project for kids and adults. holiday | hostess gift | potato stamp | stamped napkin | dish towel | Do It Your Freaking Self

Time: 20 minutes or less
Cost: $15 (or cost of napkins)
Festive level: 5

Continue reading

How to Make DIY Mini Journals

on October 27, 2016

I don’t know why, but every year during back to school time I end up with at least 5 new notebooks that I probably didn’t need. In fact, I have half a shelf of notebooks that I haven’t even cracked. I can’t help it! Lately, I’ve been toying with the idea of keeping a traveler’s notebook. One that I can shove all of my random photos, notes, people, places, things, etc. into to keep track of things. Ya’ll know I don’t update facebook enough, so what am I gonna have when everything is said and done? I don’t even have digital posts to back it up?

Okay, so check out these super easy diy mini journals I made for that express purpose. There is nothing worse than lugging a huge book around with you and finding something and these diy mini journals are perfect for trips, seasons, or (if you’ll be going to see Fantastic Beasts and Where to Find Them) the magical creatures you see. These also make really wonderful Christmas presents and gift tags!

Time: 20 minutes
Cost: $20 (or less if you already have some items on hand)

Continue reading

DIY Halloween Glitter Pumpkins

on October 6, 2016

I’m going to preface this and say that it has been a ridiculous amount of time since I have gotten to carve a pumpkin. So if you want to come over and get messy and do that with me, I am down.

That being said, I somehow ended up with 6 foam pumpkins from the dollar tree this year. I honestly don’t know how it happened. They just seem to multiply like tribbles or something. I made it my mission this week to “edit” at least one of them so I could join the cool club of wonderfully painted and decorated pumpkins. And you know what…. I did it.

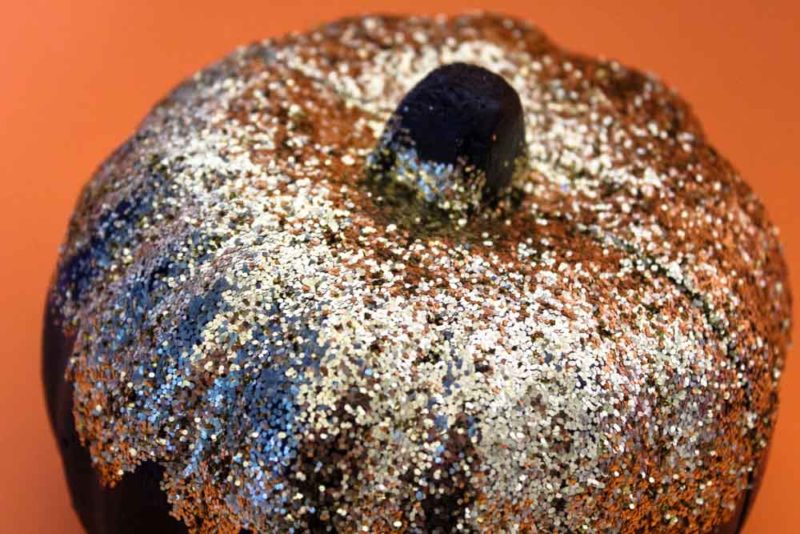
Transform foam pumpkins from the dollar tree into chic DIY Glitter Pumpkins for you halloween and fall decor!


Grab some paint, glue and glitter and no one will believe that these glitter pumpkins cost you less than $5 TOTAL. Seriously. Everything came from the dollar tree. Even the paint. Girl get on it!

Time: 30 minutes or less plus dry time
Cost: Under $5
Spooky level: 2…. they’re cute!

Continue reading

How to Make a 5 Minute DIY Skull Vase

on September 23, 2016

Make a DIY Skull Vase in under 5 minutes! Just cut a hole in the top of a plastic skull and fill with fake flowers!

Does anyone skip fall decorating and go straight for halloween? I figure it’s probably easier for me to do halloween first instead of fall – halloween – fall again.

Okay, so I maybe went a little overboard with the halloween this year, but whatever. I’m a crafter. If you don’t have a ton of time to create things and are on the broke boat, you can still do amazing things for super cheap. You just need some ingenuity and a trip to the dollar store. This 5 Minute DIY Skull Vase can be made for under $5 (including fake flowers) and are great for your halloween and Day of the Dead decor.

Continue reading

Woodland Creatures Painted Mason Jars

on September 19, 2016

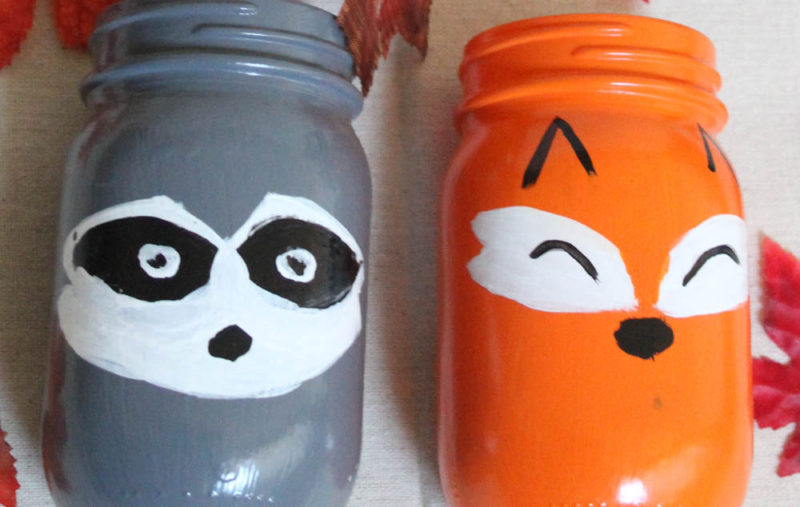
How adorable are these Woodland Creature Painted Mason Jars? I’m not going to lie… I’m super sad that they’re going to someone’s home and not staying with me. These jars are for a dear friend whose daughter has a forest themed room and I’m pretty sure she is going to LOVE them! At least for a few minutes.

I’m at the age now that, even though I’m single and doing me, a lot of my friends are having (or already have) kids. Not that I fault them, it really is an amazing thing to be a mother, but I’m just not at that place in my life yet. It kind of sucks though because part of me feels stuck while everyone is moving on with their lives. Any one else feel this way? I’ve just decided I’m going to be the cool aunt that makes them fun outfits and bakes with them, making me favorite aunt (even though I’m not related).

Simple DIY Fox and Raccoon Woodland Creatures painted mason jars for your kids room or fall decor!

Woodland Creatures Painted Mason Jars
Time: 1 Hour + Dry Time
Cost: $5 or less – most items were on hand
Cuteness Level: 9

Continue reading

Sugar Cookie DIY Magnet Board

on August 29, 2016

This post contains affiliate links. Shopping from these links helps support this website and my addiction to cupcakes and craft supplies.

I like big cookies and I cannot lie… wait, what? Okay, now that my Sir Mix A Lot reference is out of the way, it’s time to talk about this DIY Magnet Board. Do you have one? What do you use it for? Up until recently I had this giant cork board that has since fallen and cracked beyond repair. Don’t ask me what happened. I’m blaming the cat.

Use an old Pizza pan to create a one of a kind Sugar Cookie DIY Magnet Board. Sweeten up your home command center or dorm room!

So I needed a new, fun way to keep track of upcoming things, leave a note for the room mate, or just plain have it as decoration. I’m a big believer in the whole form and function thing as I move forward in life. I guess it’s part of the “de-cluttering” thing I’m attempting and potentially failing at. I’m also using a lot of 3M Command Strips to hang things. Honestly, I’m a bit in love with them. Command strips are great and mighty for hanging pretty much anything. They can take the weight and are better than putting nails in your rental!

BUT! Did you know you could make one out of a pizza pan? Yep! So get thee to a dollar tree and let’s make some fun stuffs!

Time: 1 hour + dry time
Cost: Under $10
Cuteness level: 9

Continue reading

DIY Pokémon Go Pins

on July 13, 2016

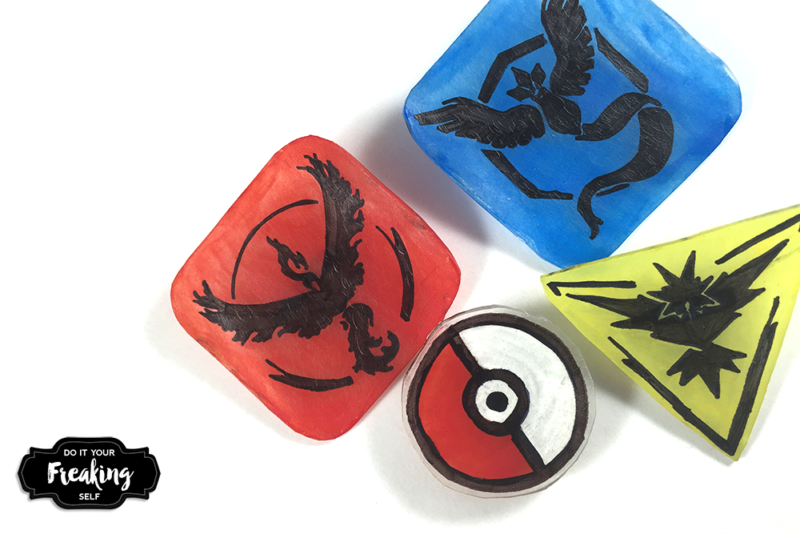
Show your Pokémon Go Team pride with these fun DIY Pokémon Go Pins!

You guys! You guys! I’m sure you’ve noticed, but you can now play Pokémon in real life and I feel like it’s 4th grade again except we’re actually leaving the lunch table and walking around.

I’m not going to lie, I’m walking around a lot more, meeting new people and taking random pictures of my friends petting Pokémon. It’s pretty amazing. So… health benefits y’all. Also!!! It is now okay for all of us to walk around looking completely geeked out. People think it’s awesome. The boys I babysit are even excited to leave the ipads at home (WHAT?) and take a walk with me!!!

Show your team pride with these fun DIY Pokémon Go Pins! Connect with your team Instinct, Mystic or Valor with this easy craft

So, as you play this awesome augmented reality game and wander around your city trying to catch them all, you may want to show your team pride. I made these fun DIY Pokémon Go Pins in about 30 minutes and am wearing them all over town. So the real question is… are you team Instinct, team Mystic, or team Valor?

Continue reading

7908931b45bb58060632ba4d10fa313cac59bfd6aaf838390e