
The holidays are upon us you guys and I could not be more excited! I’m also not quite ready. Seriously you guys, I’m hosting my annual Friendsgiving and I haven’t even sent invites. Welcome to my life you guys. Some stuff is super organized the rest is well…. it is what it is.
Anyway! One of the things I’m not stressing over is the table setting because DIY-ing that stuff is totally my jam. This week, I’ve been cranking out some really fun stamped holiday napkins and grabbing the kiddos to help. The best part is that I am using things that I already had in the house so I really only had to purchase the napkins. Can you say WIN! I’m sharing 2 ways to stamp your holiday napkins so hit the jump to see what we used!
Time: 20 minutes or less
Cost: $15 (or cost of napkins)
Festive level: 5
DIY Stamped Holiday Napkins

Supplies:
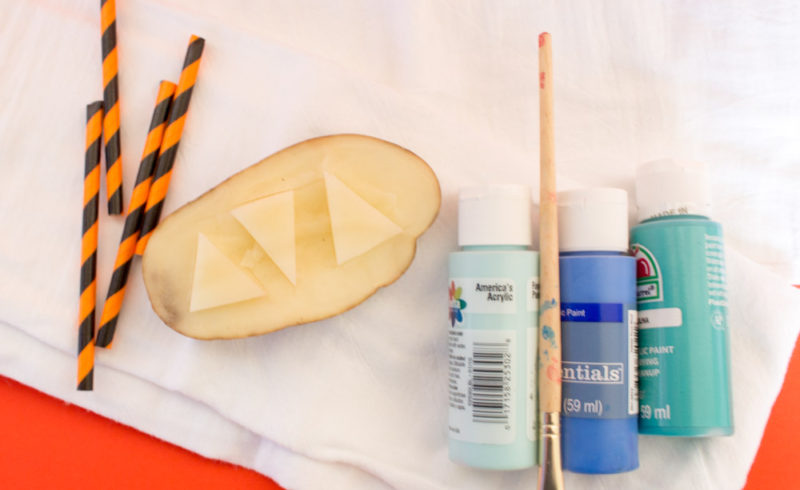
Flour Sack Napkins
Paper Straws
Paint Brush
Potato (YEP! Potato stamps again!)
Craft Knife
Pencil
Acrylic paint in your choice of colors (I used shades of blue)
Iron
Method 1:
This is probably my favorite method to do with the kiddos.
On a plate or painting surface, drop blobs of paint to create a palette.
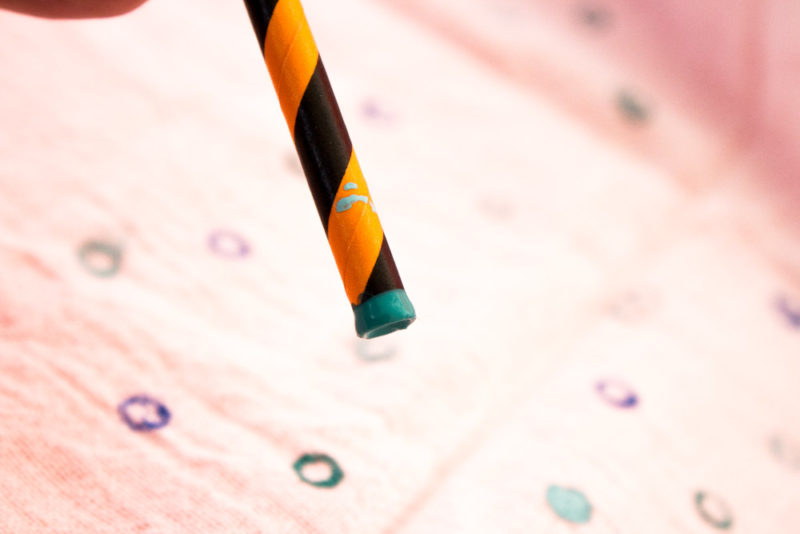
Cut your paper straws in half and use the straws as stamps to create fun polkadots with each color paint. Simply dip the end of the straw into the paint and get to stamping!
Once the paint is dry iron your holiday napkins to set the paint.

Method 2:
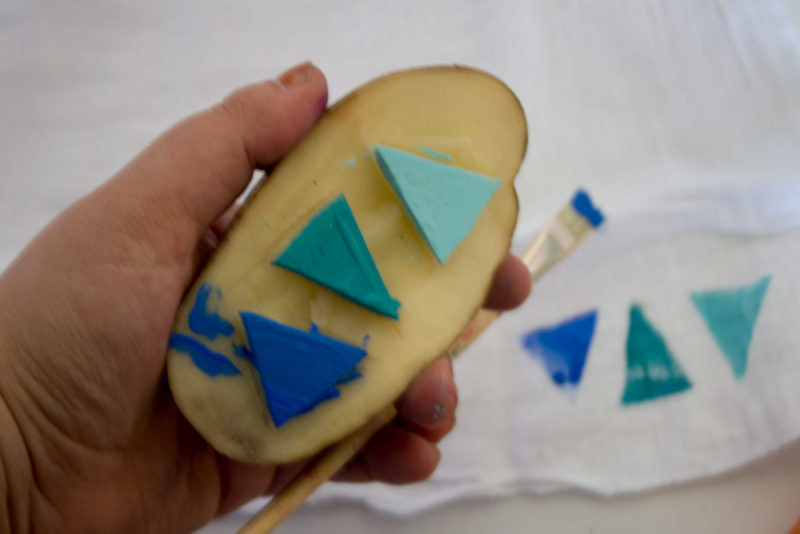
Create your palette like you did in method 1, but this time you’ll be using the paint brushes to add the paint to the stamp.
Create the stamp by slicing your potato in half lengthwise. This will give you more surface area for a larger print.

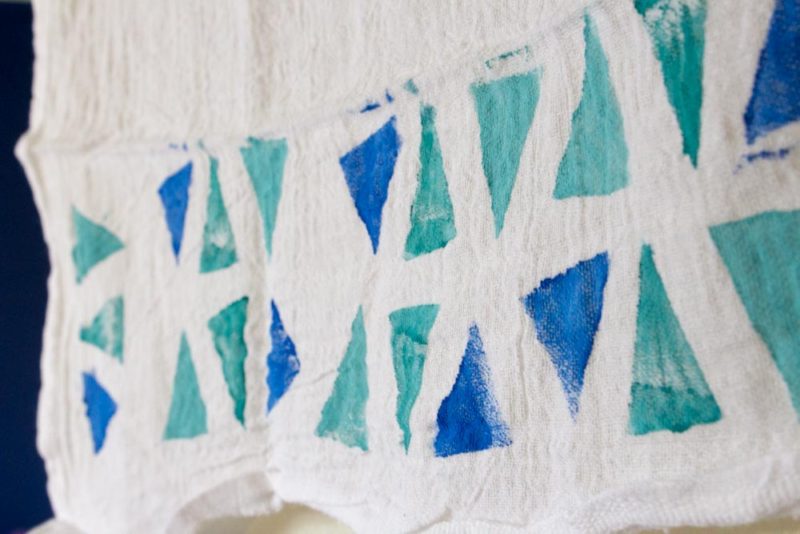
Using your pencil, lightly trace your chosen design onto the flat side of the potato then use the craft knife to carve around the shapes, leaving them raised as a stamp. I chose triangles for a fun geometric design.
Since I was using three colors of paint, I used three paint brushes to brush the paint onto each stamp. You could try dipping them but I found it leaves a really thick stamp that ends up drying really hard.
Keep going until you’re happy with the design. I did a few rows of triangles on the bottom of my holiday napkin then sliced the stamp up to create a light random pattern across the rest of the flour sack towel.
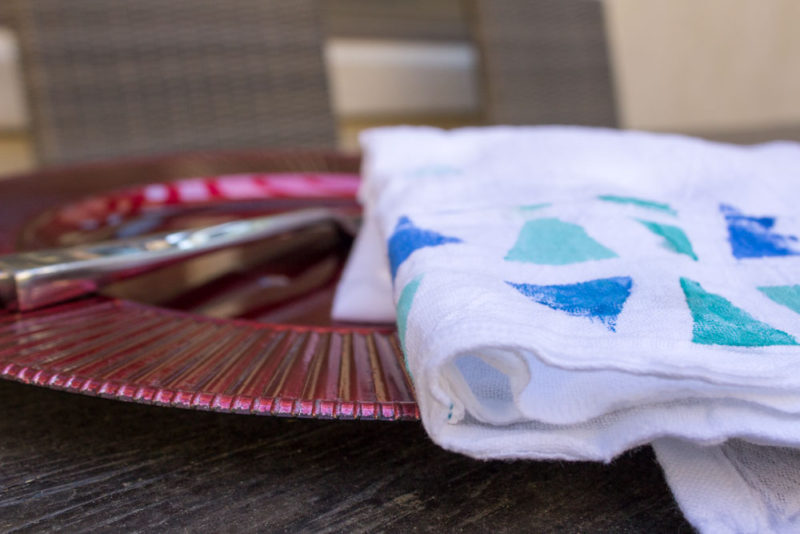
When the paint has dried, iron the fabric to set the paint.
Wash before using and enjoy! These make really fun teacher gifts, hostess presents, and are great for a DIY Tablescape over the holidays! I can’t wait to see what you make!


3 Comments
[…] […]
November 9, 2016 at 3:01 am[…] posts from last week’s party (head over to Jennifer’s blog to see who she featured): DIY Stamped Holiday Napkins from Do It Your Freaking […]
September 4, 2017 at 11:28 amHello!
September 7, 2021 at 1:20 amThings look so cute
Thankyou!