Turn dollar store placemats into a bright and fun DIY Placemat Handbag

on July 18, 2017

Take some cheap dollar store placemats and turn them into a bright and colorful DIY Placemat Handbag with a sew or glue method!
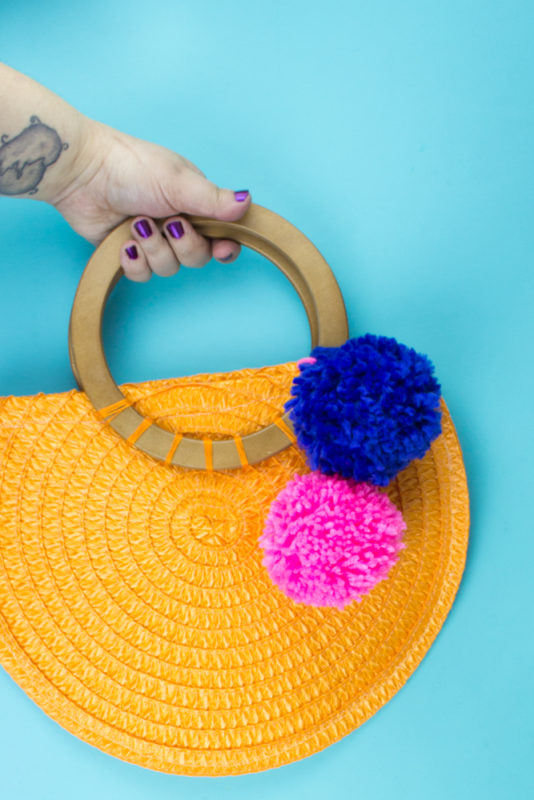
Take some cheap dollar store placemats and turn them into a bright and colorful DIY Placemat Handbag with a sew or glue method!


“Take me with you, I start to miss you…”
– Cross My Heart, Mariana’s Trench

If you’re a pop punker, power pop, whatever you’re into and haven’t heard of Mariana’s Trench, you’re missing out. I firmly believe they’re Canada’s appology for Justin Bieber (because all of this is after Celine Dion who is a national treasure).

This post may contain affiliate links. Shopping from these links means that the price stays the same for you but I get a few pennies to keep the coffee pot full and possibly the cat fed.

You guys! I made a thing. Okay so that’s basically how I start every day of my life. But seriously, I kinda love it. This project? It was made while on a binge of the Mariana’s Trench Pandora Station while it was 100+ degrees outside and my bedroom doesn’t have AC. I do have an evaporative cooler, but that is beside the point. To say that sweat went into this placemat handbag is an understatement… okay that’s gross. Ignore that. BUT this I gotta say is pretty cool. I even put pom poms on it and you know how I feel about pom poms. AND it’s ORANGE!!! So bright and sunny! And you can change out the pom poms for fall should you feel like it!

Make it: DIY Abstract Flamingo Bag

Time: 2 hours or less
Cost: $10 or less
Dork level: 2 – it’s pretty classy. You can dork it up with fun keychains if you want!

DIY Placemat Handbag

What you need:
2 round placemats from the Dollar Store
Sewing machine OR Aleene’s® Original Tacky Glue® OR Hot Glue
Wooden handles
Matching color embroidery thread and embroidery needle
Wooden handles
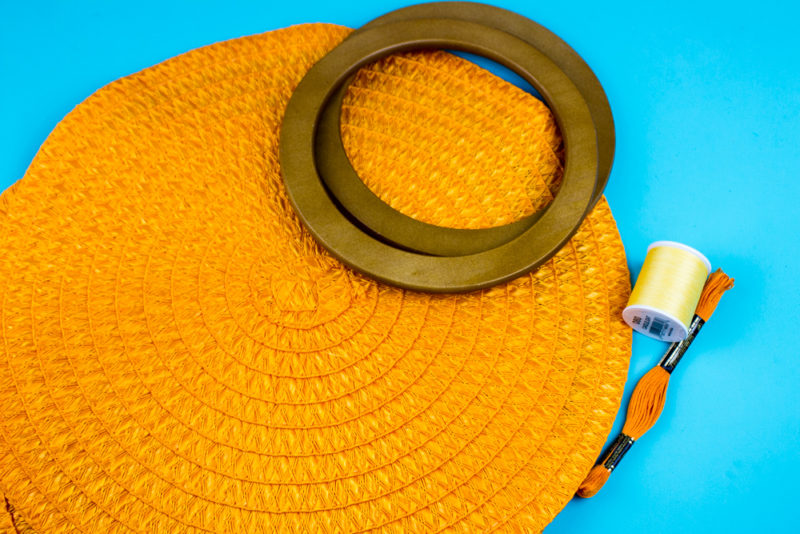
Take some cheap dollar store placemats and turn them into a bright and colorful DIY Placemat Handbag with a sew or glue method!

Make It: Animal Butt Magnets

Take some cheap dollar store placemats and turn them into a bright and colorful DIY Placemat Handbag with a sew or glue method!


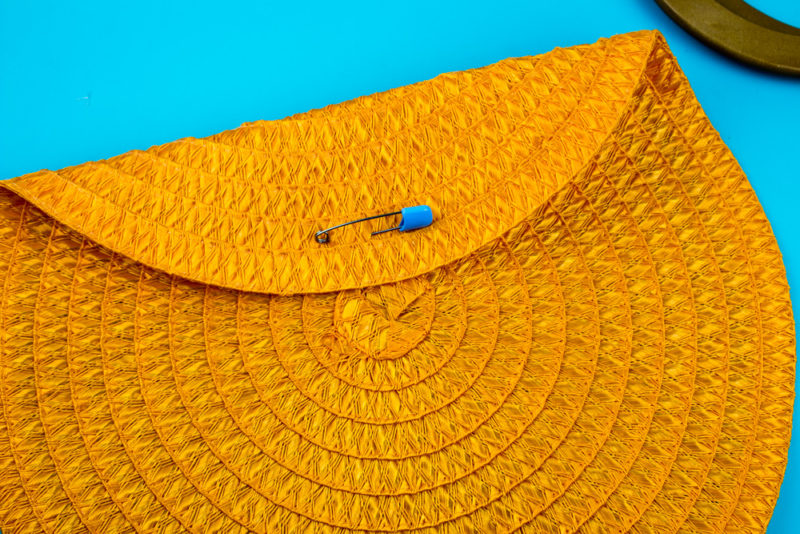
Start by folding over the top 1/3 of each placemat and secure it with a safety pin. Glue the inside with Aleene’s® Original Tacky Glue® or hot glue to secure it down or sew the top edge of the fold. – let dry if you’re using glue
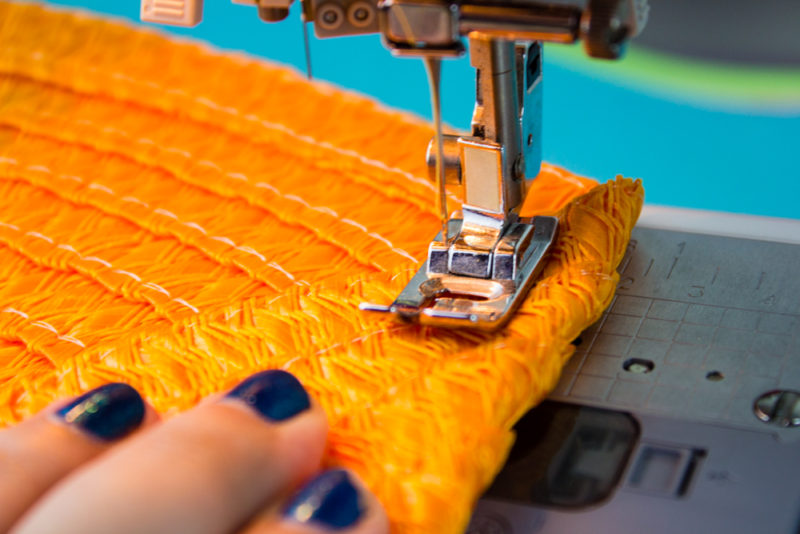
Take some cheap dollar store placemats and turn them into a bright and colorful DIY Placemat Handbag with a sew or glue method!


Match the fold sides inside and pin the outside edge around with safety pins. Sew around the outside edge right up to the folded area. It’s even easier if you’re glueing!
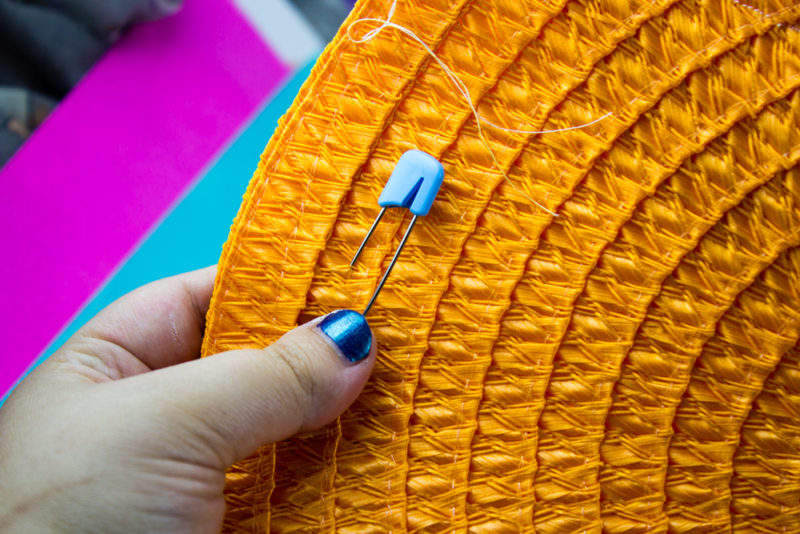
Take some cheap dollar store placemats and turn them into a bright and colorful DIY Placemat Handbag with a sew or glue method!

To attach the handles, position the handle centered so that 2/3 of the handle is above the fold. Secure down by loop stitching with embroidery thread and needle with 5-7 secure points. Secure each side and the center first and then add points on each side.
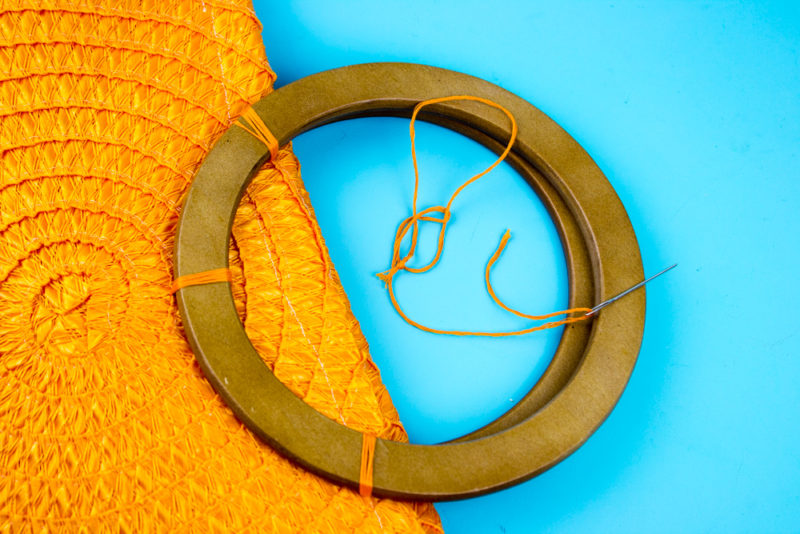
Take some cheap dollar store placemats and turn them into a bright and colorful DIY Placemat Handbag with a sew or glue method!

Do the same for the second. Trim up threads and glue down the stray embroidery thread to make sure knots hold.
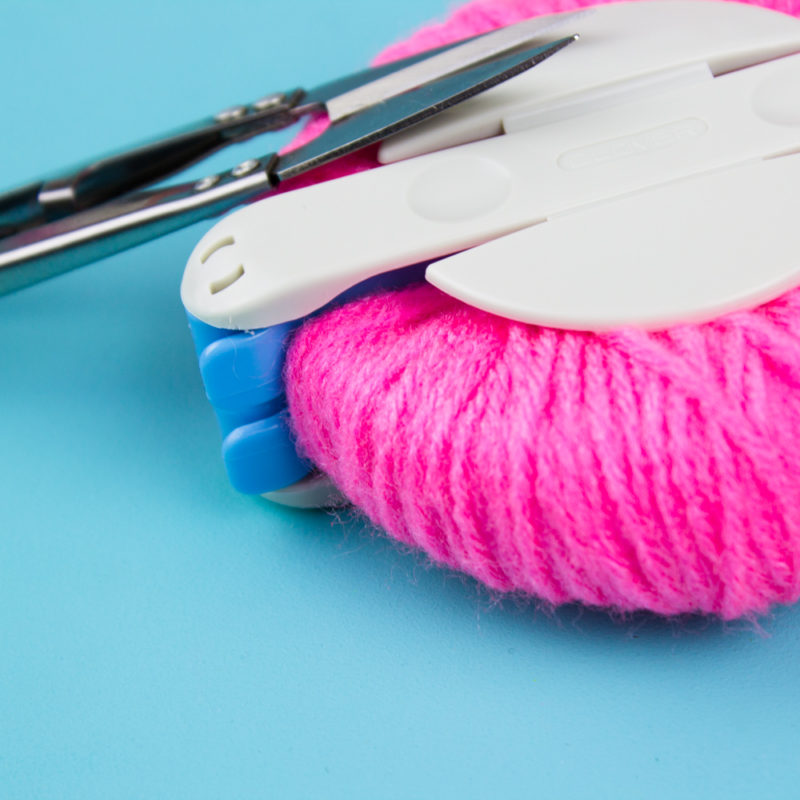
Take some cheap dollar store placemats and turn them into a bright and colorful DIY Placemat Handbag with a sew or glue method!

Embellish however you feel like! Pom poms, tassels, have at it!

Don’t forget to PIN to your fashion or DIY boards!

Take some cheap dollar store placemats and turn them into a bright and colorful DIY Placemat Handbag with a sew or glue method!

Song Lyric Etched Wine Glasses

on July 12, 2017
This shop has been compensated by Collective Bias, Inc. and its advertiser. All opinions are mine alone. The following content is intended for readers who are 21 or older. #Chardonnation #NotableSummer#CollectiveBias
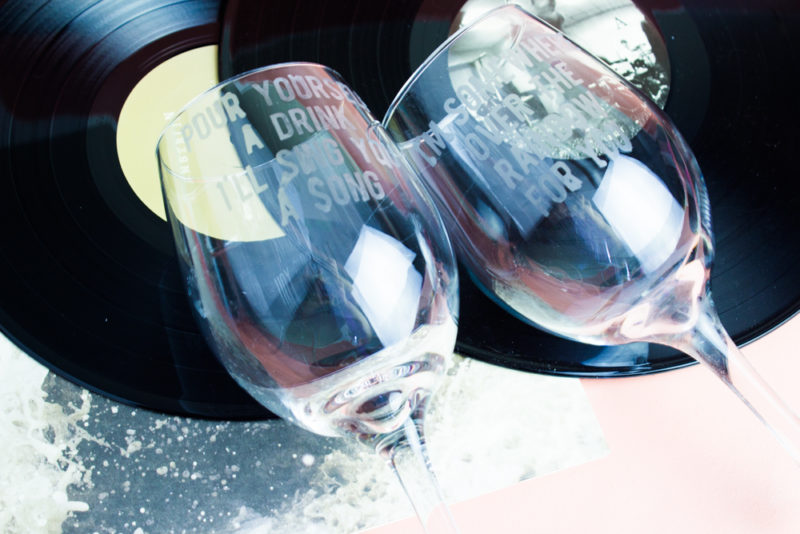
Pair your favorite songs with your favorite wine with these simple Song Lyric Etched Wine Glasses. Great for girls nights, listening parties, hostess gifts and more! #shop #cbias #chardonnation #notablesummer

Pair your favorite songs with your favorite wine with these simple Song Lyric Etched Wine Glasses. Great for girls nights, listening parties, hostess gifts and more!

Pair your favorite songs with your favorite wine with these simple Song Lyric Etched Wine Glasses. Great for girls nights, listening parties, hostess gifts and more! #shop #cbias #chardonnation #notablesummer

On hot summer nights I like to open up the windows, pull out my favorite vinyl and drink a cold glass of wine. I invite the gal pals over for some great conversation and noshing and well… we call those nights “Vinyl and Wine” nights. There is just something about the evening and flavors that really bring out the experience. And as you guys know… I am all about the sensory experience and flavor is probably at the top of my list.

Pair your favorite songs with your favorite wine with these simple Song Lyric Etched Wine Glasses. Great for girls nights, listening parties, hostess gifts and more! #shop #cbias #chardonnation #notablesummer

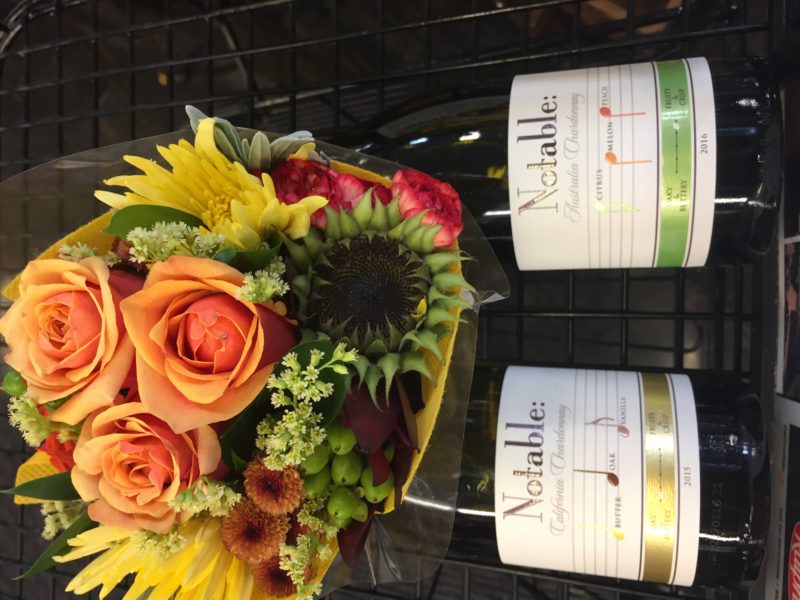
Thanks Notable Wines for giving me the perfect excuse to host a great Vinyl and Wine night with my gal pals to talk sound and flavor senses. I teamed up with them today to make these pretty classy (if I do say so myself) lyric etched wine glasses inspired my their two varietals of Chardonnay that highlight the flavor right on the bottle!

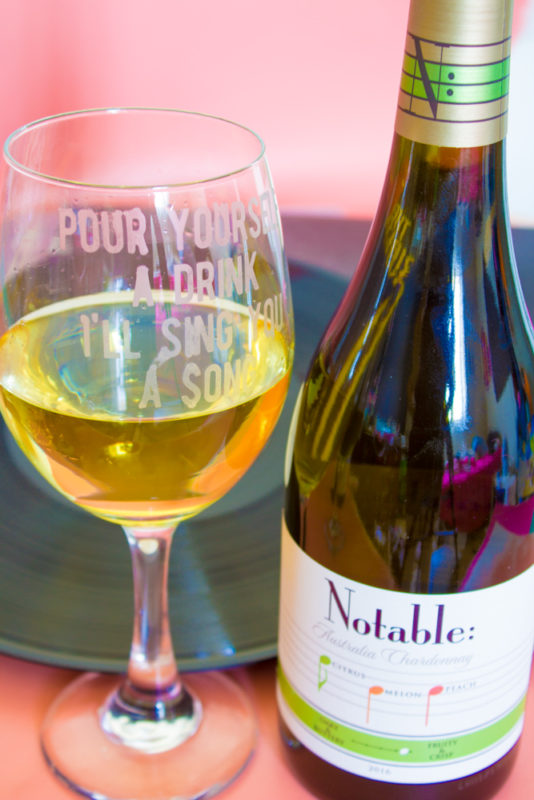
For this get together, we had the Oaky and Buttery (California) Chardonnay and the Fruity and Crisp (Australia) Chardonnay. My favorite thing to do was pair each wine with a song or lyric that hightlighted the flavors so for the Oaky and Buttery Chardonnay, I chose a more full bodied, deeper song and for the Fruity and Crisp, I chose a song that is a little bit lighter and acoustic.

Song Lyric Etched Wine Glasses

Pair your favorite songs with your favorite wine with these simple Song Lyric Etched Wine Glasses. Great for girls nights, listening parties, hostess gifts and more! #shop msg 4 21+ #cbias #chardonnation #notablesummer

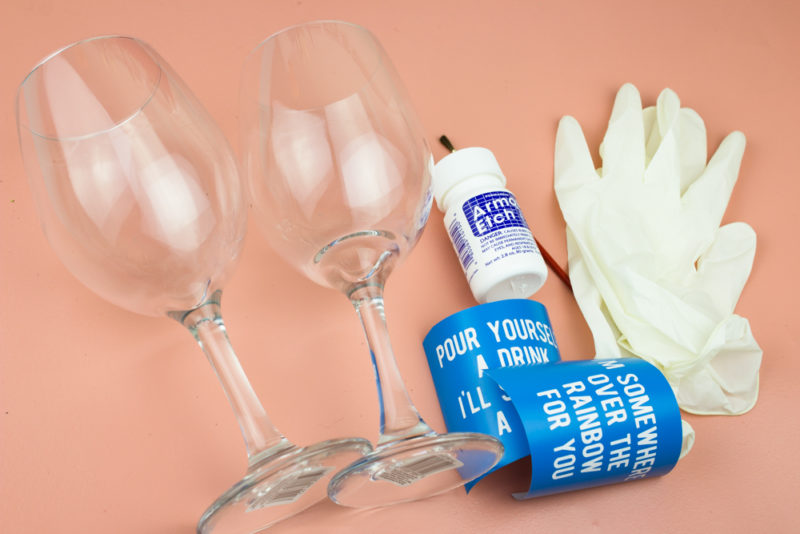
Wine Glasses
Stencil tape or adhesive vinyl
Pencil and craft knife
Template
Etching cream

To begin, clean your wine glasses off with rubbing alcohol. That will make sure you have a clean surface to start with.

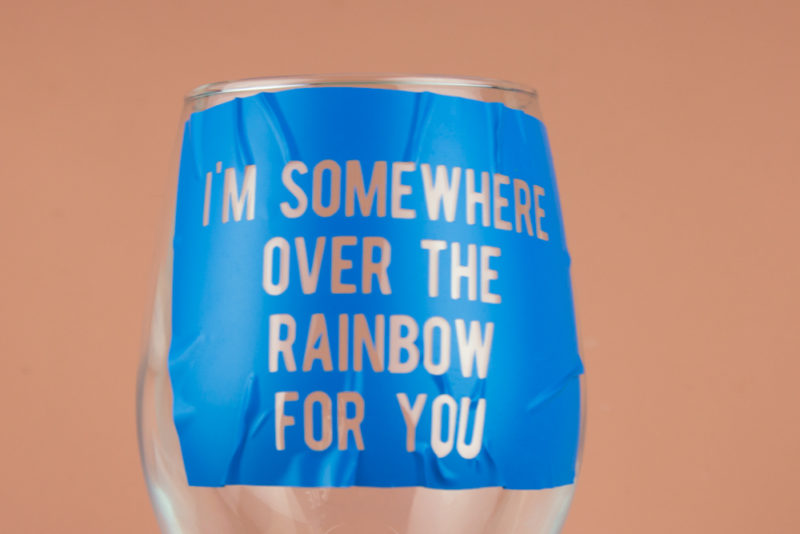
Cut out your lyrics. If you’re super fancy and have a cricut, you can simply load the template into the design space and set the size – 3×2″.

If you want to do your own lyrics you can choose your font in the program and go to town! Mine turned out a little smudgy… but I think the quotes were a little long.

Pair your favorite songs with your favorite wine with these simple Song Lyric Etched Wine Glasses. Great for girls nights, listening parties, hostess gifts and more! #shop msg 4 21+ #cbias #chardonnation #notablesummer

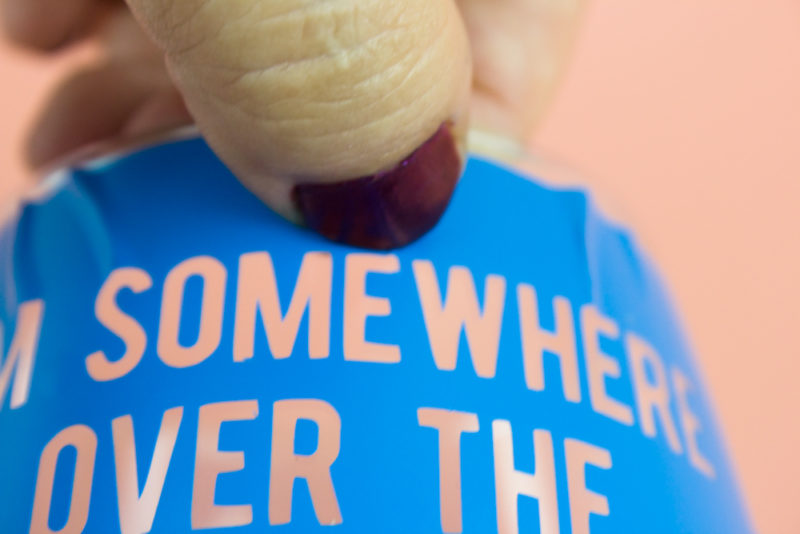
Adhere the lyric cut outs to your wine glasses. If you’re using larger quotes there will be some bubbles in the vinyl. That’s fine. Just use your nail to squidge it down so that the edges are sealed in.

Pair your favorite songs with your favorite wine with these simple Song Lyric Etched Wine Glasses. Great for girls nights, listening parties, hostess gifts and more! #shop msg 4 21+ #cbias #chardonnation #notablesummer

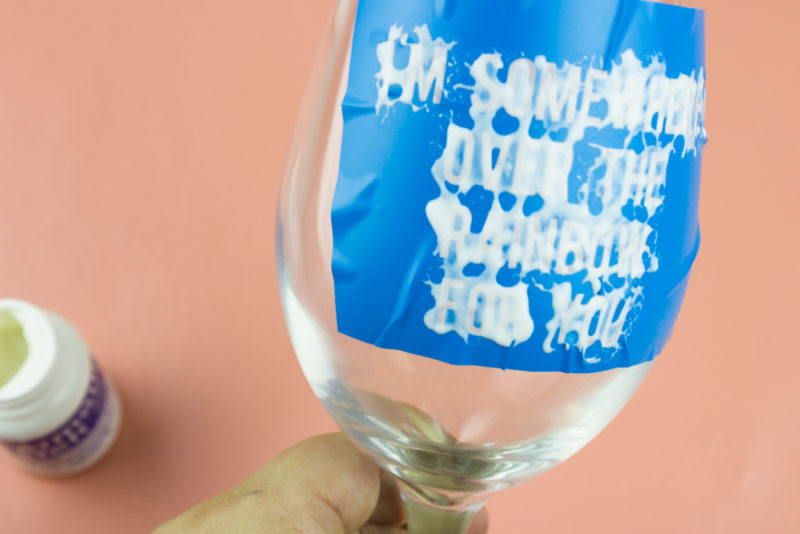
Put on your latex or rubber glove and begin to paint on the etching cream in globs. Just dab it on there. Once it’s all on there, let it sit for 3-5 minutes. I found that for these glasses, 5 minutes was better.

Pair your favorite songs with your favorite wine with these simple Song Lyric Etched Wine Glasses. Great for girls nights, listening parties, hostess gifts and more! #shop msg 4 21+ #cbias #chardonnation #notablesummer

Once it has set, simply wash the etching cream off in the kitchen sink. Peel the stencil away and rinse some more until everything is off of the glass.

Pair your favorite songs with your favorite wine with these simple Song Lyric Etched Wine Glasses. Great for girls nights, listening parties, hostess gifts and more! #shop msg 4 21+ #cbias #chardonnation #notablesummer

Voila! Pour a glass of either Oaky and Buttery or Fruity and Crisp Notable Wines’ Chardonnay and pair with your favorite music. What songs will your pair it with at your next “Vinyl and Wine” night?

Pair your favorite songs with your favorite wine with these simple Song Lyric Etched Wine Glasses. Great for girls nights, listening parties, hostess gifts and more! #shop msg 4 21+ #cbias #chardonnation #notablesummer

Pair your favorite songs with your favorite wine with these simple Song Lyric Etched Wine Glasses. Great for girls nights, listening parties, hostess gifts and more!

Summer Guilty Pleasures Playlist

on July 10, 2017

Amp up your summer music selection with a fun but possibly embarassing playlist of some of your favorite summer guilty pleasures!

Amp up your summer music selection with a fun but possibly embarassing playlist of some of your favorite summer guilty pleasures!


Summer is half over and I gotta tell you guys, I am in desperate need of some windows down, fist pumping, singing at the top of your lungs action. But alas, I’m stuck in traffic. And I kinda don’t care? Is it bad if I annoy the car next to me with “Call Me Maybe” or “Come On Eileen”? Nope. No it is not. So I’m gonna do it. But with the windows up. Because it’s hot. And I don’t want to waste my air conditioning. Or something like that.

Since I’m on this quest to embrace my inner dork and be super open about it,  I thought I’d share my Summer Guilty Pleasures Playlist with you guys. So whether you wanna jam with me or sing really loud or quietly snicker about the fact that I know ALL the words to “Summer Girls” AND “Teenage Dirtbag”, pop over to Spotify and have a listen! You know you want to!

Summer Guilty Pleasures Playlist

Easy Slutty Brownies Recipe

on July 7, 2017

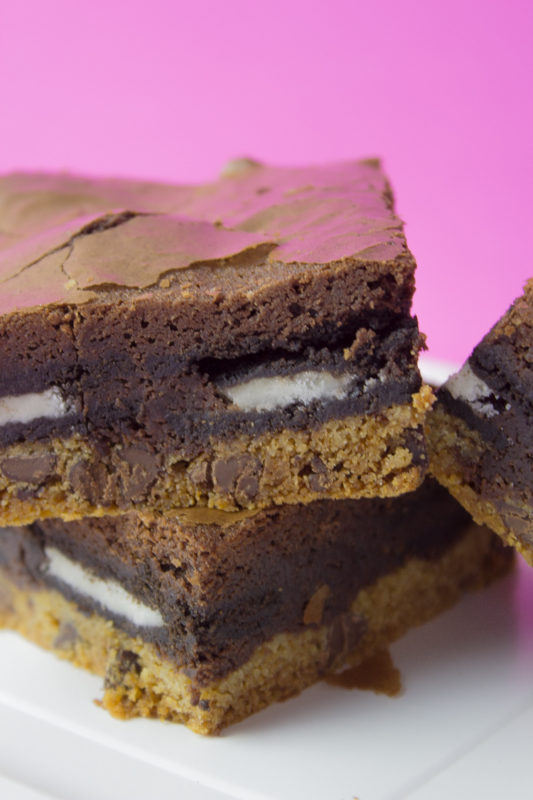
Treat yo’self to layers of delicious chocolate chip cookie, oreos and brownie batter! Indulge in some rich chocolate goodness with easy slutty brownies.

Treat yo'self to layers of delicious chocolate chip cookie, oreos and brownie batter! Indulge in some rich chocolate goodness with easy slutty brownies

This post may contain affiliate links. Shopping from these links means the price stays the same for you but I make a few pennies to keep the lights on and the unicorns fed.

A few years ago when I worked in an office I was the defacto cupcake baker. Basically I bake when I’m stressed and that job stressed me out so I would bake cupcakes on the weekends and would feed my stress cupcakes to all of my coworkers – hello run on sentence! Mostly because I did not want to stress eat them. See where I’m going with this? Okay maybe not.

So one Wednesday there was this declicious pan of amazing gooeyness on the break room table that I had not stress baked. Come to find out, they were called Slutty Brownies and I wondered why I hadn’t thought of them before. Let me tell you… I was in chocolate heaven! Like more than that kid in Matlida that stole a piece of cake. Slutty brownies are an original invention from The Londoner, popularized by What’s Gabby Cooking, and made easy and a bit twisty by me.

Treat yo'self to layers of delicious chocolate chip cookie, oreos and brownie batter! Indulge in some rich chocolate goodness with easy slutty brownies.

These Easy Slutty Brownies are perfect for a girls night in, stress baking, easy baking, you name it and you need chocolate… get on it!

Continue reading

DIY Game of Thrones House Sigil Glasses

on July 5, 2017

Show your Game of Thrones pride with some easy custom DIY Game of Thrones House Sigil Glasses. Represent your favorite houses and drink up!

Show your Game of Thrones pride with some easy custom DIY Game of Thrones House Sigil Glasses. Represent your favorite houses and drink up!

This post may contain affiliate links. Shopping from these links means that the price stays the same for you but I get a few pennies to keep the coffee pot full and possibly the cat fed.

If there is one thing you must do at every Game of Thrones Premiere party, it is drink ale, or at least something that looks like it. It was the custom of the time dudes! So why not embrace your inner dork and love for Game of Thrones by repping your favorite house and letting your friends do the same?

Show your Game of Thrones pride with some easy custom DIY Game of Thrones House Sigil Glasses. Represent your favorite houses and drink up!

Okay, so one year my friends all decided to dress up as Game of Thrones for Halloween. It was seriously amazing. We even had dragons! James wore leggings! It was magical.

The problem for me was that there wasn’t really a character that I connected with and other characters that I was interested in had already been claimed. Those friends of course ended up not going to Mickey’s Halloween Party with us, but decisions had to be made and they lost out. Me? After much deliberation, I stuck with House Stark. I made my own cape and went as (D)Eddard Stark. Why? Because I got to run around in a cape and I didn’t have to worry about a fancy dress. Enough said.

Continue reading

DIY Game of Thrones Cutting Board

on July 1, 2017

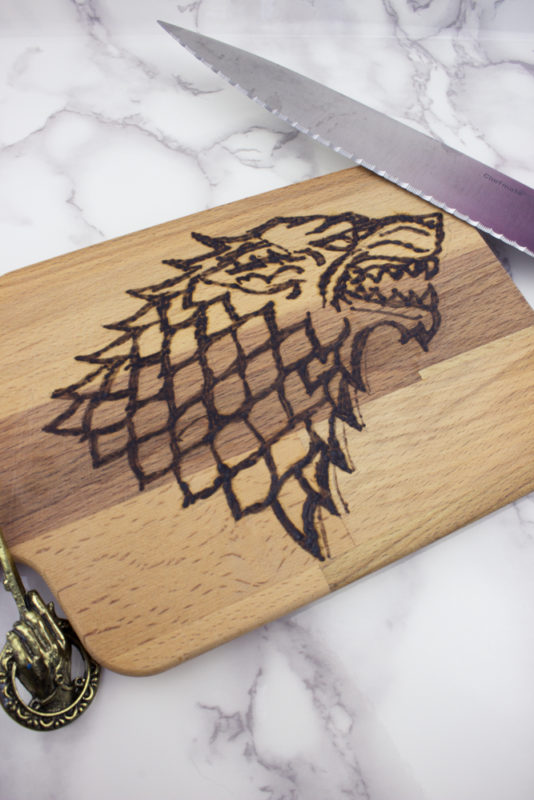
Create your own wood burned Game of Thrones Cutting Board with this easy tutorial. If you’ve ever wanted to try wood burning, this is a fun project to get you started!

Create your own wood burned Game of Thrones Cutting Board with this easy tutorial. If you've ever wanted to try wood burning, this is a fun project to get you started!

This post may contain affiliate links. Shopping from these links means that the price stays the same for you but I get a few pennies to keep the coffee pot full and possibly the cat fed.

I admit it, I love Game of Thrones! But… I couldn’t hack the books. Anyone else in the same boat? I think what I love most is the fandom surrounding it. It is intense and I seriously love being in the room with my friends who are OBSESSED with it and I feel like it makes me a better fan? Or not. I don’t know. But I do know that I’m really interested to see what happens to particular characters and sometimes read spoilers of scenes that will probably make me want to puke… know know the ones I’m talking about. Sorry to get too graphic on you guys.

Anyway, this Game of Thrones Cutting Board is a gift for my friend who has made almost every “Winter is Coming” joke he can possibly make this month and more. If you’ve got one or you are that person this makes the perfect addition to your kitchen geekery!

Continue reading

4th of July Pom Pom Cake Topper

on June 27, 2017

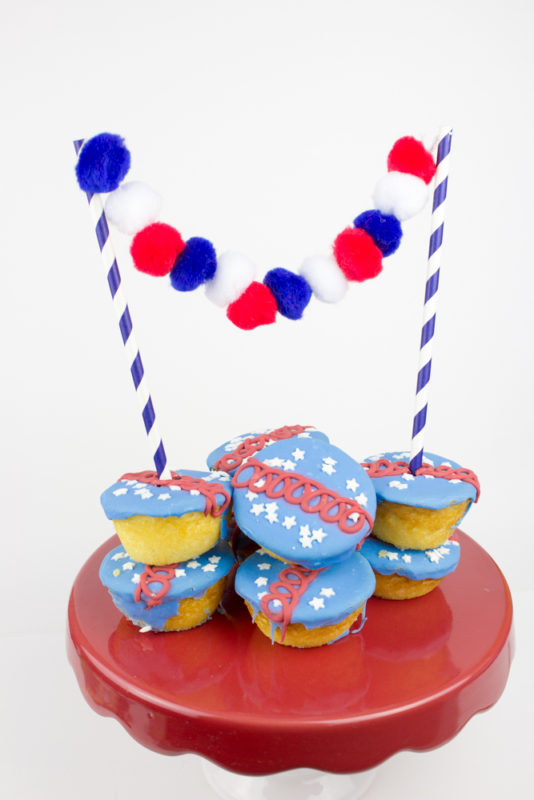
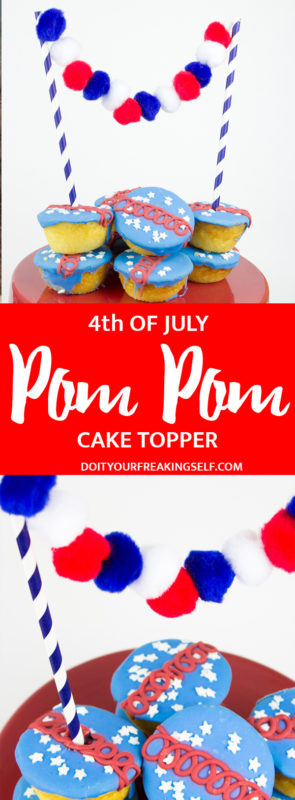
Throw some pom poms into your Independence day celebrations with this unbelievably simple DIY 4th of July Pom Pom Cake Topper.

Throw some pom poms into your Independence day celebrations with this unbelievably simple DIY 4th of July Pom Pom Cake Topper.

This post may contain affiliate links. Shopping from these links means that the price stays the same for you but I get a few pennies to keep the coffee pot full and possibly the cat fed.

I was going to start this post with some pithy comment about how much I love fireworks but I gotta be honest with you guys, sometimes I don’t really have time or want to make fancy cupcakes for gatherings. Whew. There, I said it. Sometimes I just don’t have time for all the prep and want to take it back old school with random snack cakes that everyone can appreciate…. do you see where I’m going with this?

Throw some pom poms into your Independence day celebrations with this unbelievably simple DIY 4th of July Pom Pom Cake Topper.

Yes. I am taking Hostess Cupcakes to my friend’s 4th of July party and I am not ashamed to admit it. Why? Because everyone loves those little cream filled tasty things. And if they don’t, they’ll appreciate the nostaligia of when our mom’s used to pack them in our lunch boxes or when they’d be a party treat. That being said, I figured I should jazz them up a little with a fun pom pom cake topper. You dig?

So whether you’re like me and digging the nostalgia factor, baking your own cake or using a store bought one (no shame!) you can always dress it up and make it your own with this unbelievably simple 4th of July Pom Pom Cake Topper. Let me show you how!

4th of July Pom Pom Cake Topper

Cost: $5 or less
Time: 10 minutes max
Patriotic factor: 8 (because red, white and blue you guys!!!)

Throw some pom poms into your Independence day celebrations with this unbelievably simple DIY 4th of July Pom Pom Cake Topper.

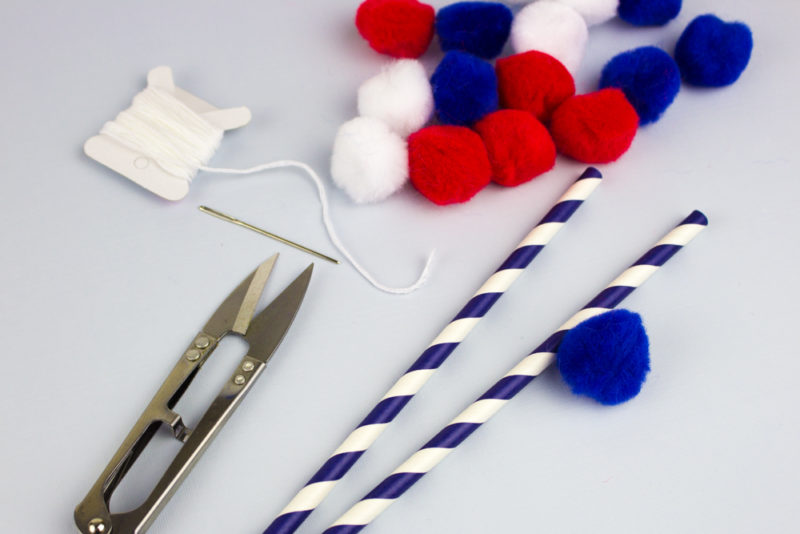
Supplies:
Red, White and Blue Pom Poms
Paper Straws
Embroidery Floss – Or bakers twine, regular thread, or even dental floss
Embroidery needle
Scissors or Craft knife

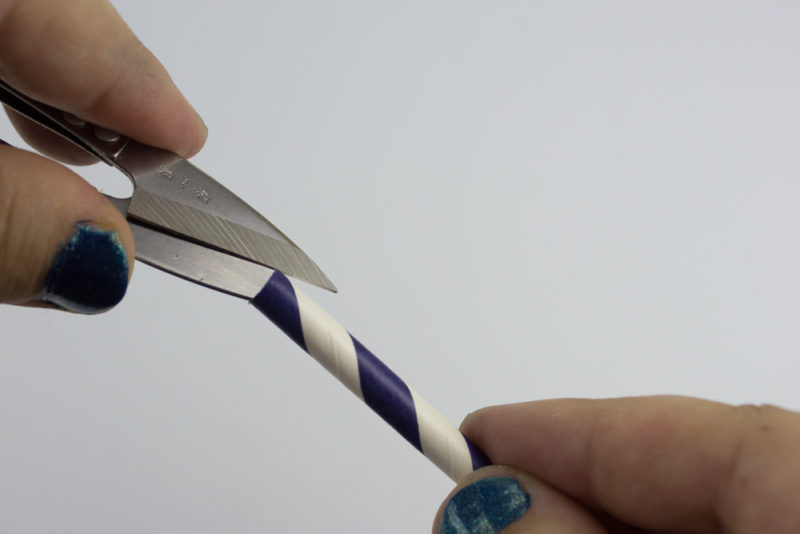
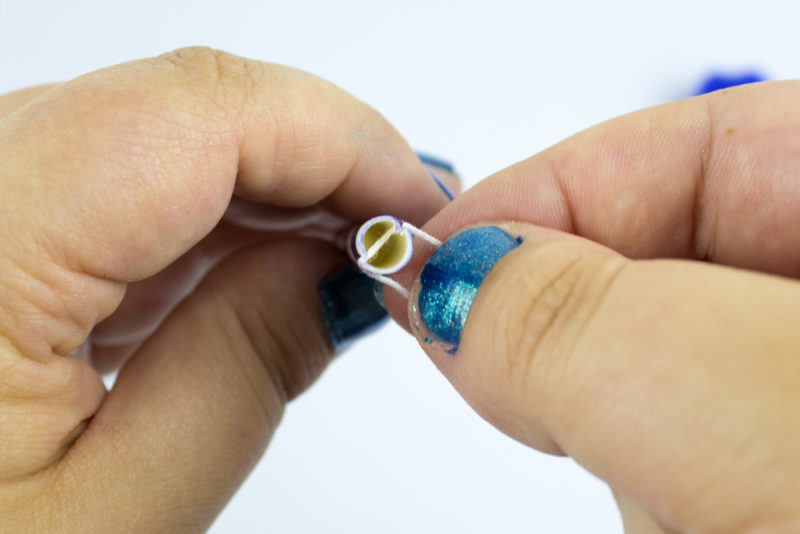
Begin by cutting two 1/8 inch vertical slits in the top of each straw. You’ll want them to be across from each other.

Throw some pom poms into your Independence day celebrations with this unbelievably simple DIY 4th of July Pom Pom Cake Topper.

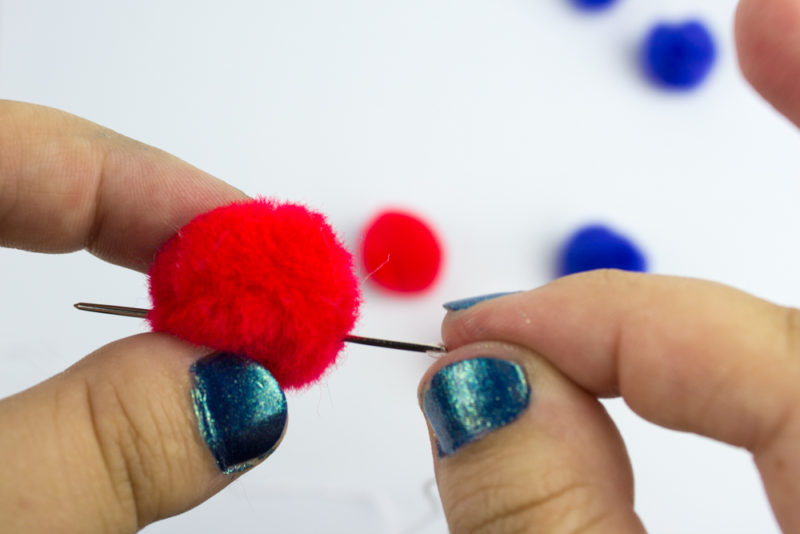
Cut an 8 inch piece of string and tie a knot in the end. Thread it through the needle and start threading on pom poms. String on as many as you want or as little. Just think about the length you want the topper to be across your cake (or cupcakes)

Throw some pom poms into your Independence day celebrations with this unbelievably simple DIY 4th of July Pom Pom Cake Topper.

When you have the desired amount in whatever pattern you chose to put them in tie a knot for the length you want it to be. Then simply place the thread between the two slits on each side – knot on the outside. Cut off the ends of the string and space the pom poms out to your liking and voila! You just upped your presentation game!

Throw some pom poms into your Independence day celebrations with this unbelievably simple DIY 4th of July Pom Pom Cake Topper.


Throw some pom poms into your Independence day celebrations with this unbelievably simple DIY 4th of July Pom Pom Cake Topper.

Happy Birthday America! Go get your party on.

Don’t forget to PIN this post to your Memorial Day or 4th of July party boards!
Throw some pom poms into your Independence day celebrations with this unbelievably simple DIY 4th of July Pom Pom Cake Topper.

SaveSave

DIY Alcohol Ink Pitcher and Glass Set

on June 24, 2017

Create to impress this summer with this DIY Alcohol Ink Pitcher and Glass set! A perfect fit for a backyard party or watercolor paint and sip!

Create to impress this summer with this DIY Alcohol Ink Pitcher and Glass set! A perfect fit for a backyard party or watercolor paint and sip!

This post may contain affiliate links. Shopping from these links means that the price stays the same for you but I get a few pennies to keep the coffee pot full and possibly the cat fed.

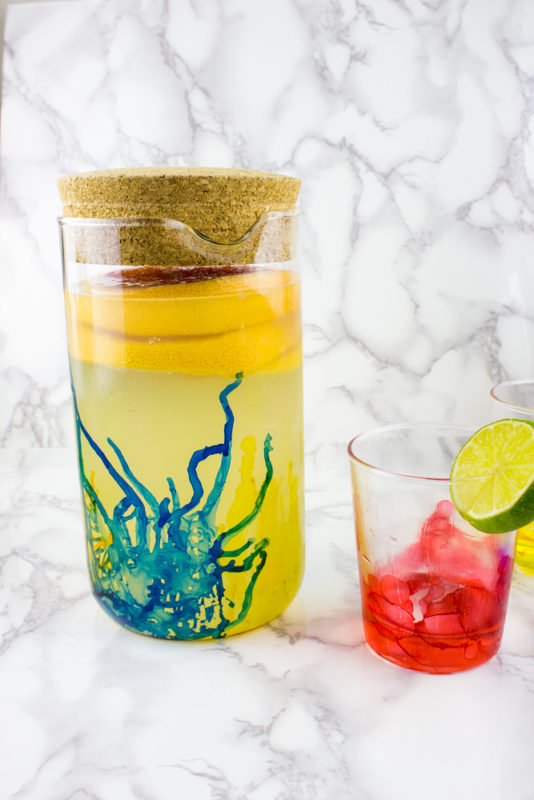
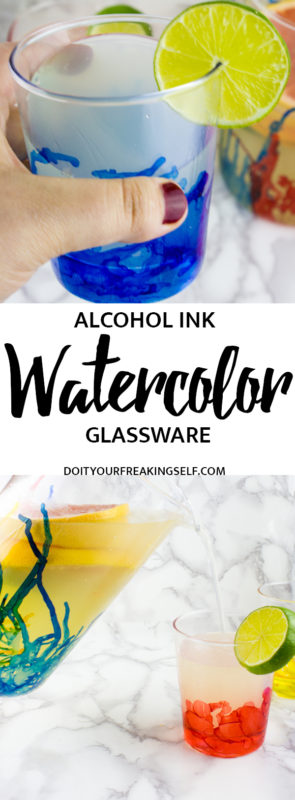
It’s officially summer! That means pool parties, back yard star gazing, picnics and brunch. All in wide brimmed hats and flowy skirts. It also means summer drinks and the fun barware gets to come out to play! Okay so it is probably known that I have a thing for watercolor and alcohol ink. I just love how they look all colorful and smokey! For this alcohol ink pitcher and glass set, I kept it colorful using three primary colors and an easy coat of dishwasher safe mod podge. Yep! That’s it! Whatever colors you wanna make them, go for it! Just embrace that quirky side of you and do splotches or drips or whatever you like, then serve up your favorite drink to yourself and some of your favorite people!

Cost: $20-30 depending on what you have on hand
Time: Weekend Project
Fun level: During the project is like a 4 but after when you’re drinking margaritas it’s definitely a 10!

DIY Alcohol Ink Pitcher and Glass Set

Create to impress this summer with this DIY Alcohol Ink Pitcher and Glass set! A perfect fit for a backyard party or watercolor paint and sip!

Supplies:
Glass Pitcher – I got this one from IKEA
Glass cups – I also got these from Ikea
Alcohol Ink
Rubbing Alcohol
Cotton pads
Paint brush
Straw (optional)
Dishwasher Safe Modpodge

Create to impress this summer with this DIY Alcohol Ink Pitcher and Glass set! A perfect fit for a backyard party or watercolor paint and sip!

Start by cleaning off your pitcher and glasses with the rubbing alcohol and a cotton pad. This will help to ensure that you have a clean surface and that the ink will spread correctly. Work with the pitcher or glass upside down.

Create to impress this summer with this DIY Alcohol Ink Pitcher and Glass set! A perfect fit for a backyard party or watercolor paint and sip!

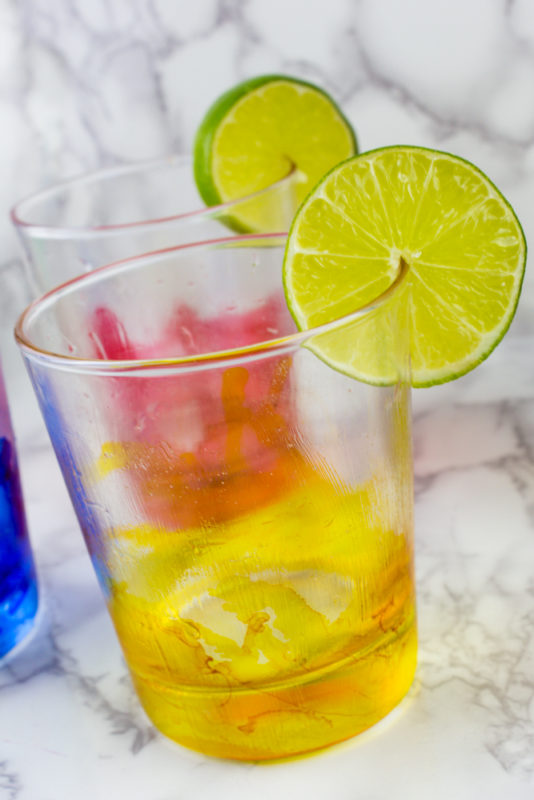
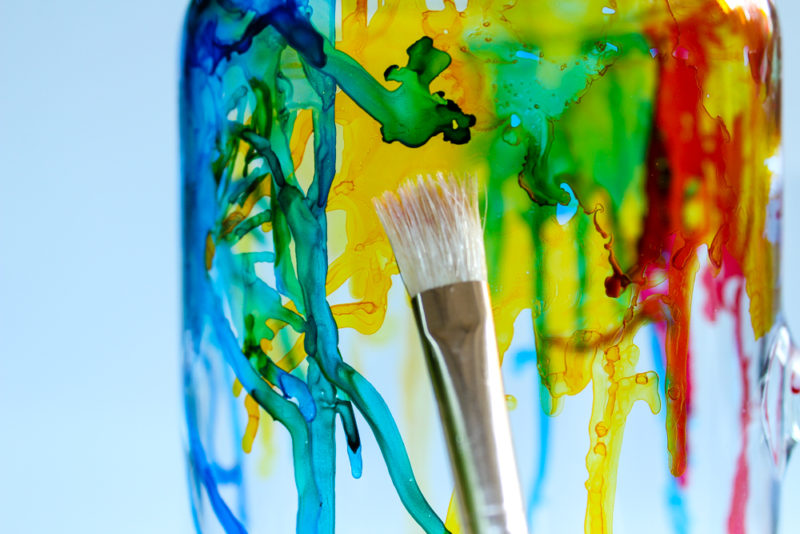
Working on a covered surface, paint a section of the bottom edge of the glass with rubbing alcohol. Then use a paint brush or the tip of the ink to paint alcohol ink on that section of your pitcher or glass. Use the straw or just tip the glass to guide the ink as it dries. It dries really quickly, but using a straw and/or blowing on it can help it along and make sure the ink doesn’t run further than you want it to.

This can take some trial and error, but the great thing is that if you mess up, you can always take it off with rubbing alcohol and start again!

Once you’re happy with your glasses and pitcher let them dry for about 2 hours. You can probably use less time but that’s what I did just to be safe.

Create to impress this summer with this DIY Alcohol Ink Pitcher and Glass set! A perfect fit for a backyard party or watercolor paint and sip!

Once your ink has set, gently paint a thin layer of dishwasher safe modpodge over the ink and up to 1/4 inches away from the lip of the glass. Let it dry overnight then add a second layer. You’re supposed to let this cure for 28 days for it to form a hard shell, but if you’re impatient like me, you can cure it in an oven.

How to cure dishwasher safe modpodge in an oven:

In a cold oven, place your items on a baking sheet. Heat the oven to 175°F then bake for 1 hour. Turn the oven off and allow your pieces to cool with the oven. I usually do this before I go to bed so they can cool over night. Once your pieces are done, they are top shelf dishwasher safe!

Go forth and make yummy margaritas and entertain your friends all day long! Don’t forget to PIN for later!

Create to impress this summer with this DIY Alcohol Ink Pitcher and Glass set! A perfect fit for a backyard party or watercolor paint and sip!


SaveSave

SaveSave

Easy DIY Magical Mermaid Bark

on June 21, 2017

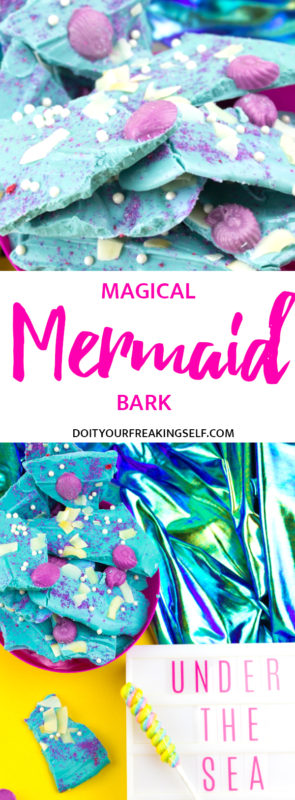
Dive under the sea with some Magical Mermaid Bark! Inspired by your favorite mermaid, this sweet treat is a must have for your summer parties or treat table!

Dive under the sea with some Magical Mermaid Bark! Inspired by your favorite mermaid, this sweet treat is a must have for your summer parties or treat table!

This post may contain affiliate links. Shopping from these links means that the price stays the same for you but I get a few pennies to keep the coffee pot full and possibly the cat fed.

In case you didn’t hear there is apparently a mermaid trend this summer. Does it look like I’m caring about that?? Okay maybe a little. But seriously folks, I was watching The Little Mermaid with a friend (because that is what we do okay?) and we were both feeling the need for some sugar and well, this happened. I feel no shame or guilt about any of it. None at all. So yeah, be a mermaid, get that swimsuit. Eat some chocolate and just embrace that -ish okay? Okay!

Easy DIY Magical Mermaid Bark

Time:20-30 minutes plus cool time
Cost: $15 or less depending on what you have on hand
Magic level: Titus Burgess as Sebastian magical.

Supplies:

Dive under the sea with some Magical Mermaid Bark! Inspired by your favorite mermaid, this sweet treat is a must have for your summer parties or treat table!

Wilton Candy Melts in Light Blue, Teal and Lavender
Piping Bag
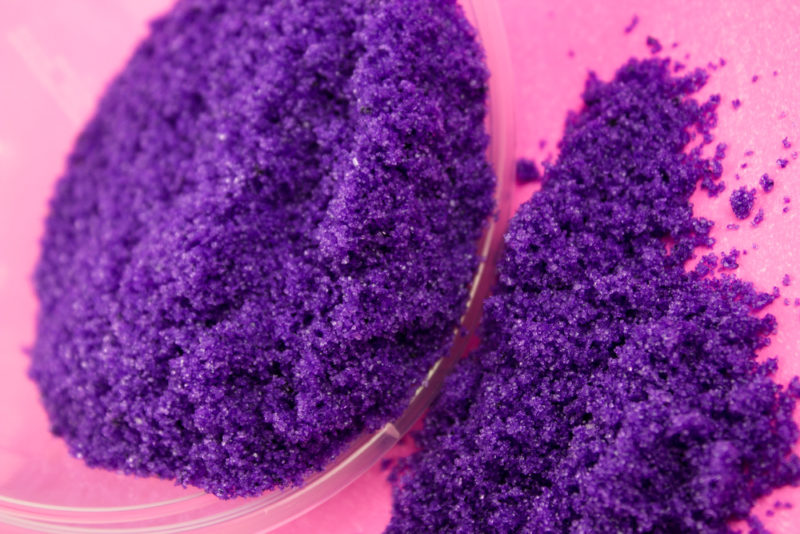
Sanding Sugars in purple and blue. – Learn how to make your own here!
Sugar pearls
Small seashell candy mold
Coconut chips
Microwave safe bowls

If you’re up to making your own sanding sugars go ahead and make those first.

Dive under the sea with some Magical Mermaid Bark! Inspired by your favorite mermaid, this sweet treat is a must have for your summer parties or treat table!

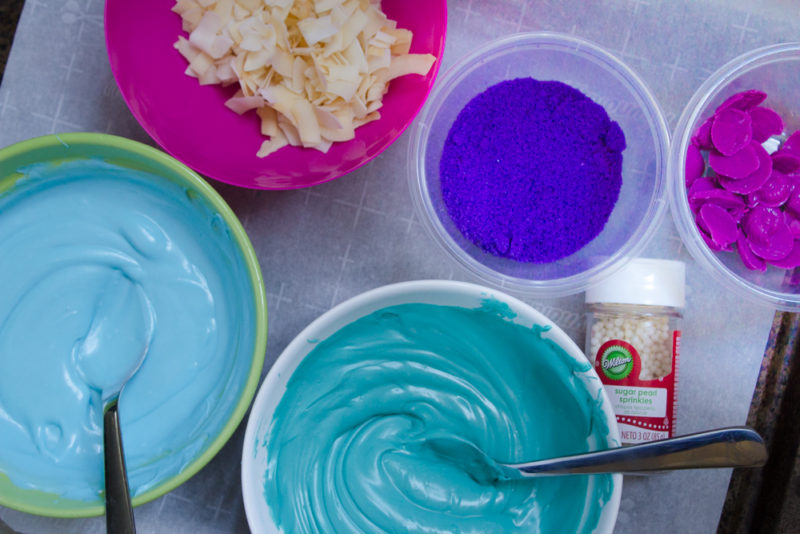
Make your purple seashells! Place 1/4 cup lavender candy melts into a piping bag. Twist the top closed and microwave for 30 seconds. Pull it out and squish around. Microwave again in 15 second bursts, mixing and squishing in between until it’s all melted. Cut a hole in the tip of the bag and fill each cavity in the mold. You may not fill all of them, but fill as many as you can. If you have any overage, simply use the edge of a spatula to smooth out. Place in fridge or freezer for 10 minutes.

Dive under the sea with some Magical Mermaid Bark! Inspired by your favorite mermaid, this sweet treat is a must have for your summer parties or treat table!

Make your base!
In separate ceramic bowls, melt your candy melts. Microwave for 1 minute. Stir. Return to microwave and zap in 15 second bursts, stiring in between until fully melted. Do this for each color you’ll be using.

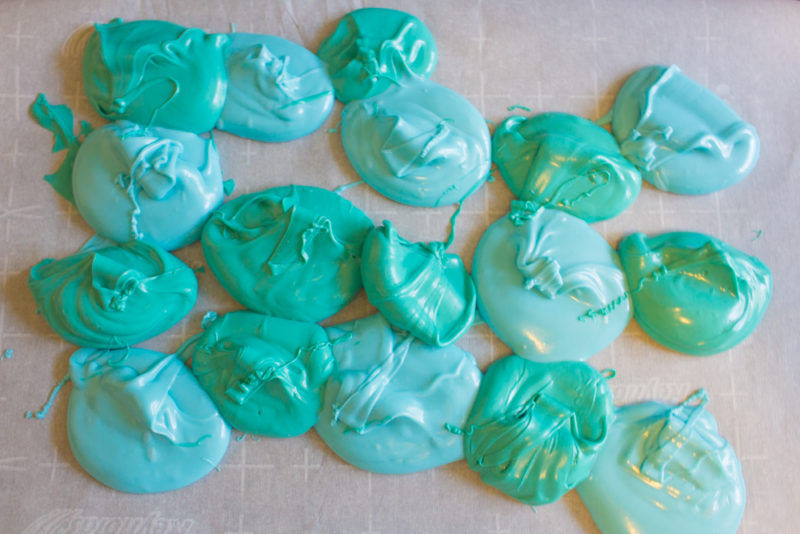
Line a baking sheet with parchment paper and place dolops of each color next to each other on the parchment paper. This is where I like to get my agression out and sometimes act like Jackson Pollock. Just go with it.

Dive under the sea with some Magical Mermaid Bark! Inspired by your favorite mermaid, this sweet treat is a must have for your summer parties or treat table!

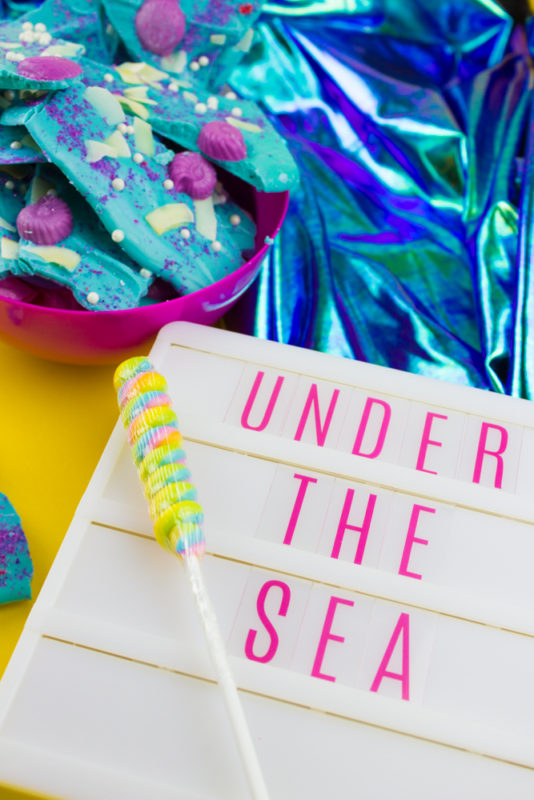
Next, use a butter knife or spatula to smooth out and swirl the colors until you’re happy with the design. While the chocolate is still kinda melty, spread your place the seashells on the base bark and sprinkle with the coconut bark, sanding sugars, and sugar pearls.

Dive under the sea with some Magical Mermaid Bark! Inspired by your favorite mermaid, this sweet treat is a must have for your summer parties or treat table!

Place in the freezer for 10 minutes or in the refrigerator for 30 minutes until the chocolate is set.

Break it up while jamming to your favorite version of Under The Sea and eat your mermaid bark with your equally mermaid obsessed best buds!
 

Don’t forget to PIN this post if you’re as obsessed with all things mermaid and magic!

Dive under the sea with some Magical Mermaid Bark! Inspired by your favorite mermaid, this sweet treat is a must have for your summer parties or treat table!

SaveSave

SaveSaveSaveSave

Make your own Custom Colored Sanding Sugar Sprinkles or Edible Glitter

on June 17, 2017

This simple way to make your own custom colored DIY sanding sugar sprinkles will blow your mind and save you money. Make custom sprinkle mixes YOUR way!

This simple way to make your own custom colored DIY sanding sugar sprinkles will blow your mind and save you money. Make custom sprinkle mixes YOUR way!

This post may contain affiliate links, that means I make a few pennies if you purchase through my links….but the price for you stays the same!

Let’s talk sanding sugar sprinkles. You guys.. it’s like glitter for cupcakes. I’m serious! Unfortunately having a variety of Colored Sanding Sugar Sprinkles can get kinda expensive and really frustrating when you can’t find the color you need for a particular party theme or inspiration. Sound familiar? Thought so.
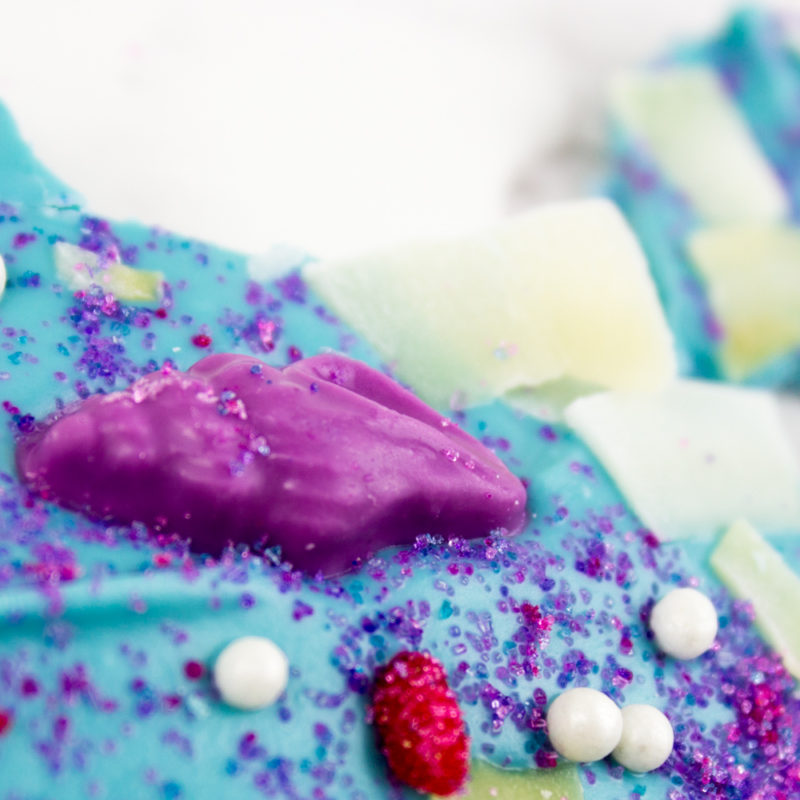
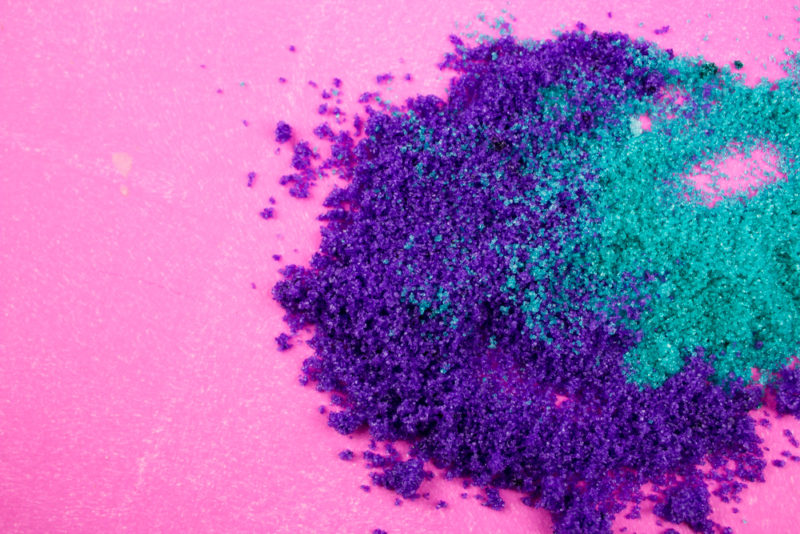
Did you know you can make your own custom colored sugar sprinkles? Yep. You can make it in just about any color you like in 20 seconds flat. And then you can use this really cool tool to make all kinds of custom designs!
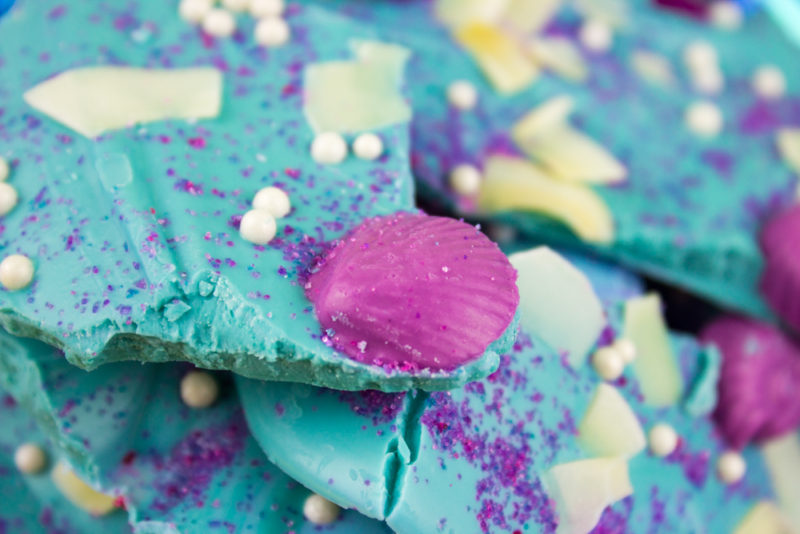
This simple way to make your own custom colored DIY sanding sugar sprinkles will blow your mind and save you money. Make custom sprinkle mixes YOUR way!

Okay so this is going to both blow your mind and save you a ton of cheddar… you ready?

Cost: $1-5 makes a ton!
Time: under 1 minute
Fun level: 10!

DIY Custom Sanding Sugar Sprinkles

This simple way to make your own custom colored DIY sanding sugar sprinkles will blow your mind and save you money. Make custom sprinkle mixes YOUR way!

Supplies:
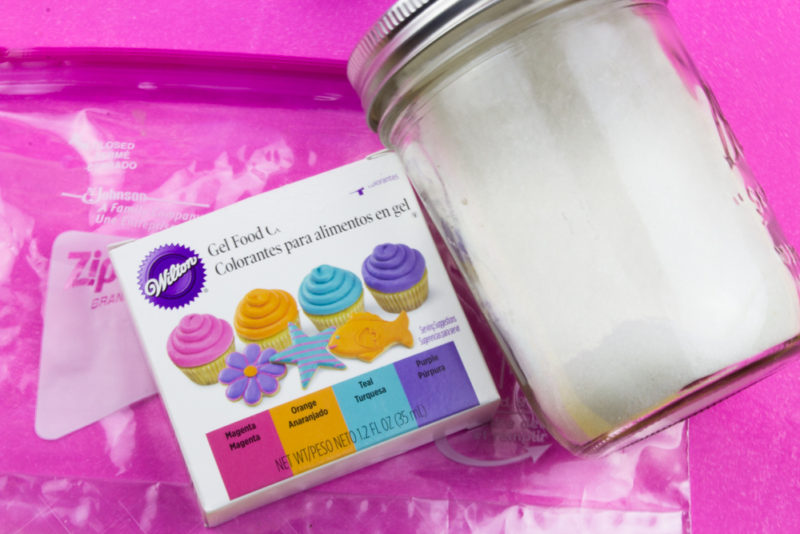
Granulated Sugar
Gel food coloring in choice color
Ziplock bags
Wax or Parchment Paper and a baking sheet (optional)

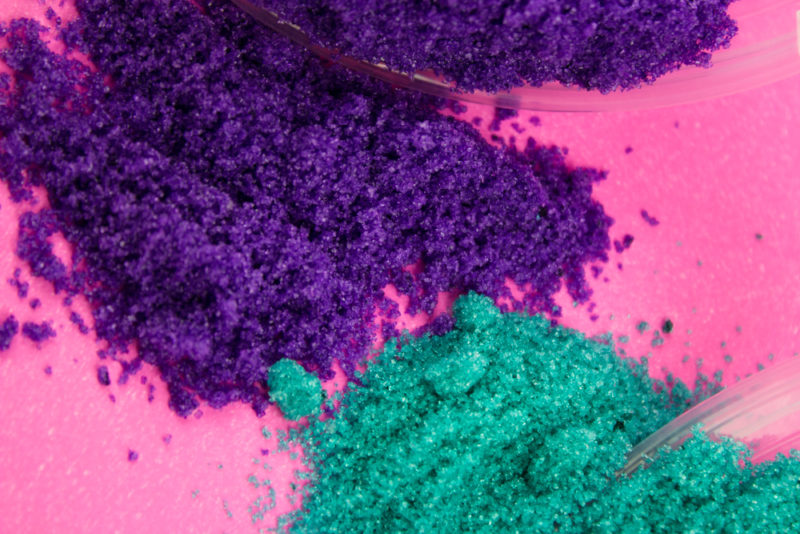
4 things! I’m sure you can do it! The coolest thing with making your own colors is that you can do it with just about any gel coloring. I used the neon Wilton Food colors because I happened to have them on hand but really, the sky is the limit.

How to make Custom Sanding Sugar Sprinkles

This simple way to make your own custom colored DIY sanding sugar sprinkles will blow your mind and save you money. Make custom sprinkle mixes YOUR way!

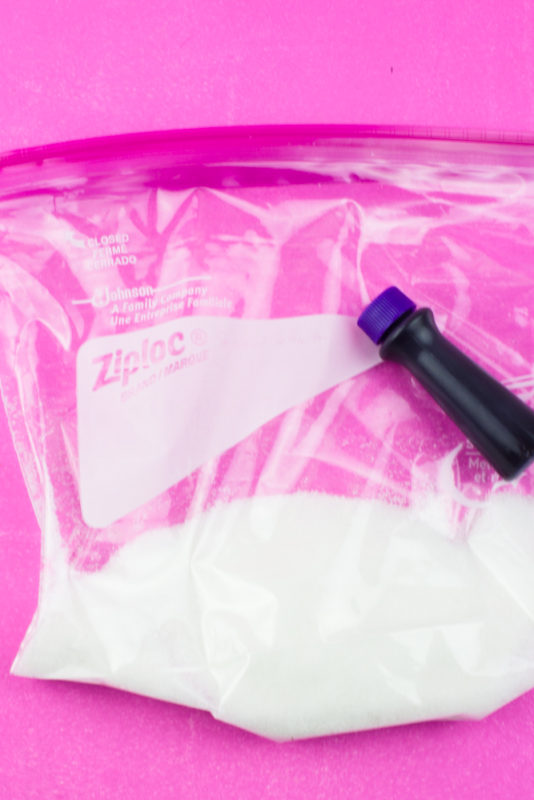
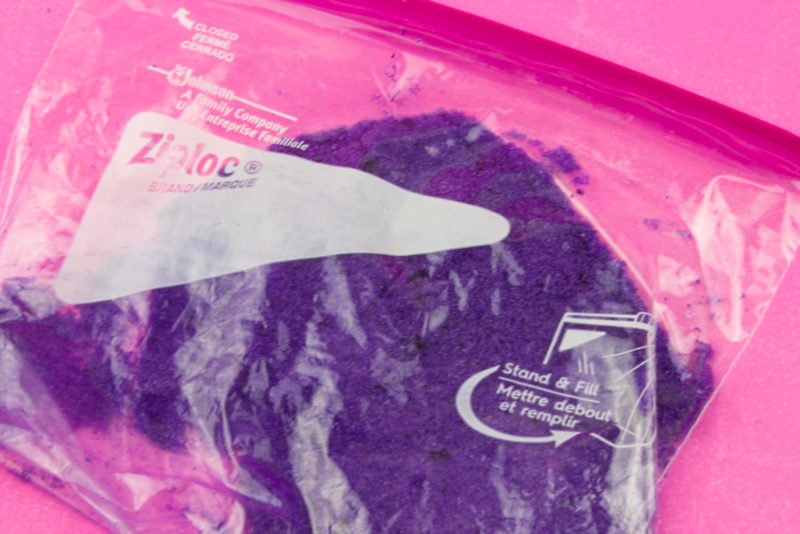
Place 1/4 c Granulated sugar (or more.. I just eyeballed how much I would need) and a few drops of food coloring into a ziplock bag. Seal it shut ( I like the ones that slide shut to avoid mess) and shake and squish. Really go for it. You want to make sure all of the food coloring is incorporated and there are no lumps. If you accidentally put too much food coloring in there just add a pinch or two of corn starch and that should soak up the moisture or you can always add more sugar!

This simple way to make your own custom colored DIY sanding sugar sprinkles will blow your mind and save you money. Make custom sprinkle mixes YOUR way!

Spread out on a wax paper lined baking sheet to let it dry out for a bit longer – 20 minutes-ish.

Transfer into an air tight container. If you want to use something to sprinkle it on I’ve also found that spice jars are both cheap and pretty awesome. Heck, I’m pretty sure I’ve got my own personal rainbow them in the cabinet right now… lemme check.

This simple way to make your own custom colored DIY sanding sugar sprinkles will blow your mind and save you money. Make custom sprinkle mixes YOUR way!

If you want to make metallic sanding sugars, you’ll need one more ingredient and that is Lustre Dust. For gold, combine the lustre dust with the granulated sugar and a few drops of yellow food coloring. For silver use silver lustre dust and a few drops of alcohol – I usually go with vodka since I have it on hand or you can use metallic food paint.

This simple way to make your own custom colored DIY sanding sugar sprinkles will blow your mind and save you money. Make custom sprinkle mixes YOUR way!

Go forth and make your custom colored sugar sprinkles!

This simple way to make your own custom colored DIY sanding sugar sprinkles will blow your mind and save you money. Make custom sprinkle mixes YOUR way!  custom sprinkle mix | Sanding sugar | candyfetti | edible glitter | Do It Your Freaking Self

SaveSave

SaveSaveSaveSaveSaveSave

SaveSave

7908931b45bb58060632ba4d10fa313cac59bfd6aaf838390e